Category: Fireplaces

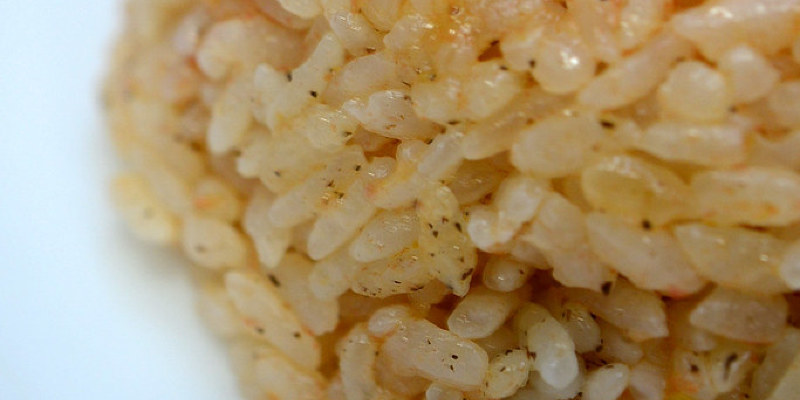
Black Spots on Ornamental Sweet Potato Vine Leaf

Growing ornamental sweet potato vines (Ipomoea batatas) is not for the faint-of-heart. Perennials at U.S. Department of Agriculture plant hardiness zones 9 through 11 and annuals elsewhere, 6- to 12-foot sweet potato vines trail from containers and scramble over bare ground with leave. Their purple-black, chartreuse or variegated foliage and late-season trumpet flowers make bold visual statements, until the unsightly black fungal spots that follow pest infestations ruin the show.

Sweet Potato Vine Pests

Tiny, sap-sucking aphids and whiteflies feed on sweet potato vine leaves. Pear-shaped aphids leave the foliage curly, wilted and discolored. Melon or cotton aphids, frequently located on sweet potatoes, soften from pale or dark green in existence to yellow as temperatures rise. Whiteflies have white-winged, yellow bodies covered with white, powdery wax. In massive numbers they cause the leaves to yellow, wither and drop. Both insects congregate and feed on the foliage undersides. The waste that they secrete is what links them directly into black, fungus-spotted leaves.

Honeydew

Aphids and whiteflies consume more sap when they need for survival. They remove the rest as a gooey, carbohydrate-dense waste called honeydew. Huge populations of the insects drench a sweet potato vine using the clear, sticky substance. Ants and black sooty mold fungi generally feed on the honeydew. Sooty-mold infested vines have a velvety black patches on their leaves.

Sooty-Mold Effects

Because sooty mold fungi feed on honeydew, they don’t penetrate or directly damage sweet potato leaf tissue. Left unchecked, sooty mold may collect enough to keep sunlight from reaching the leaves. Inadequate sun exposure interferes with the vine’s photosynthesis, possibly limiting its development. The fungus-coated leaves sometimes fall and age prematurely. Even without these issues, having sooty mold on a vine grown mainly because of its ornamental foliage is less than desirable.

Ant Management

Ants worth honeydew as a food source so highly that they kill aphids’ and whiteflies’ natural predators to secure their supply. Eliminating ant colonies close to your sweet potato vine shields these predators, including ladybugs, lacewings and parasitic wasps. Control the issue with slowly acting boric acid ant bait put near the vines for the ants to transport back to their nests.

Cultural Management

Together with the removal of honeydew-secreting insects, sooty mold fungi finally starve and wither away. If predators are not keeping aphids and whiteflies in check, a blast in the garden hose or pruning and disposing of heavily infested stems may remove light populations. Removing adult whiteflies using a handheld vacuum, and freezing the dust cup bag and its contents before disposal, may work. Avoid excessive fertilizing with nitrogen-based fluid which encourages tender, aphid-attracting new development.

Chemical Control

Insecticidal soap, horticultural or neem oil, sprayed heavily enough to saturate both surfaces of the foliage, suffocate aphids and mealybugs. These treatments only kill the insects present during application, so you may need to repeat the spraying. Spray when the plants are well nourished and the temperature is below 80 degrees Fahrenheit. Always use these remedies depending on their tag specifications.

See related

The way to Kill Fungus on Plants

Plant fungus is easily controlled by using preventive measures. If your crops or vegetable crops have become contaminated with fungi, however, you can kill it with a fungicide. Common types of fungus seen on plants consist of powdery mildew, leaf spot, blight, root rot and white mold. Though some fungal disorders do little harm to crops, others who are left untreated can cause the death of the plant. For the best chances of succeeding, treat your plants at the initial signs infection.

Put on a set of goggles, gloves, and a mask prior to using the fungicide. This will protect you from breathing in chemicals or getting them in your eyes.

Prepare a fungicide containing the main ingredient neem oil or jojoba oil, according to the product label. These oils are organic and effective at both preventing and killing fungi. They’re also safe to use on many vegetables and ornamentals.

Spray the contaminated plant thoroughly using the fungicide. You won’t achieve success unless you cover the whole plant, including both sides of the plant’s leaves.

Duplicate applications of this fungicide every seven to ten days before the fungus was completely eradicated.

See related

How can I Mount a Train on Walls?

Mounting a model train track on the wall saves loads of table or floor area and lets you leave the train set up all the time since it is out of the way. Construct your own wall-mounted setup using shelving and shelf brackets, or buy a specialty wall-mount system that appears as if it were custom-made to your space.

DIY Shelving Option

Run the track around the whole perimeter of this room by first quantifying each wall to find out how much shelf space you require. Long, pre-made fiberboard shelves offer an inexpensive option for the right runs of track; a corner shelf or a triangle of wood cut to fit each corner cares for the curved areas. Install shelf mounts directly into studs every 3 to 4 feet in the desired shelf height, keeping in mind the boards and the monitor take up some space. Assess the height of the tallest train car or accessory such as a tunnel; install the shelving in a height that accommodates the whole design with room to spare. Insert the shelving along the whole perimeter of this room, within a few inches for every single corner. Put in a length of track near each corner; then add the curved pieces in the corners to figure out how big of a shelf or even piece of wood you’ll need to your corners. Buy or cut wood to size for each corner; encourage the corner pieces with extra corner mounts.

Homemade Enclosure

Like trains mounted on a tabletop track, wall-mounted train automobiles can derail from time to time. Prevent the risk of dropping train cars by including a Plexiglas enclosure several inches high around your trail’s support shelving shelving unit. Drill a few holes to secure the material to the shelving using screws, or utilize a construction adhesive or hot glue to hold it in place.

Floating Track Mount

Some companies offer a sleek wall-mounted system that appears to float in the room, such as a floating shelf. A special interlocking channel system holds a few of these kinds of train mounts into the wall. Order the mounting program based on the magnitude of the monitor layout as well as the scale of this train collection. Some models allow space to conduct over one train at a time on independent tracks.

Add-on Elements

Decorate your wall-mounted track system with the addition of tiny LED up-lights or rope lighting behind the monitor between the monitor and the wall. For a home made shelf-style strategy, add decorative trim from the lumber section of a home improvement store to make the design look less easy. Paint the shelving to meet other trim at the room. Add tiny, compact trees for a little nature. Cut and paint thin wood or cardboard constructions to mount directly to the wall behind the train as miniature towns and train stations.

See related

Can Plants Release Toxins that Are Poisonous to Humans?

Some plants defend themselves against predators and insects by creating poisonous chemicals. A number of these chemicals are also toxic to humans. Plants don’t spew out the toxins into the environment; they simply release them when the plant is wounded, broken, touched or ingested. Volatile toxins can be discharged if a plant, containing toxic oils, is burned. Ingesting components of a toxic plant triggers the greatest threat to human health and life. Young children are those most likely to take a toxic plant without respect to its often-bitter taste. Both weeds and precious garden plants may be poisonous.

Extremely Toxic Plants

Oleander (*Nerium oleander*), deadly nightshade (*Atropa belladonna*) and castor bean (*Ricinus communis*) are highly poisonous. Oleander, an attractive shrub, and deadly nightshade, a grass or botanical specimen, develop as perennials in U.S. Department of Agriculture plant hardiness zones 5 through 9. Although all parts of oleander are toxic, gardeners develop it for its low maintenance, evergreen elliptic leaves and appealing red, pink, pink or yellow blooms. It is possible to recognize deadly nightshade mainly with its drooping, purple-brown blossoms and its shiny black berries. Castor bean, a vine, is a perennial in USDA zones 9 through 11, but it is also often grown as an annual. It’s considered an invasive plant in some regions of the nation. All pieces of castor bean are toxic but especially its seeds, which contain the poison *ricin*. Gardeners value the castor bean vine for its large, pointy leaves and attractive leaf capsules.

Moderately Toxic Plants

Although extremely toxic plants threaten the life of vulnerable individuals when ingested, moderately toxic plants generally only cause discomforts like stomach cramps, diarrhea and vomiting. Wisteria (*Wisteria spp. *) is an instance of a group of fairly toxic plants, growing as shrubby vines in USDA zones 5 through 9. All of wisteria display spectacular, long flower racemes. Flower colors range from white, lilac to purple, depending on the species or variety. Chinese wisteria (*Wisteria sinensis*) and Japanese wisteria (*Wisteria floribunda*) are vigorous growers and become unruly if not regulated by routine pruning. American wisteria (*Wisteria frutescens*) is better behaved. All flowers, leaves and seeds of wisterias are fairly toxic if ingested.

Irritating Plant Sap

When you split the stems of plants like elephant ears (*Alocasia spp. *), the sap or juice leaking out will irritate skin since the stems contain *oxalate crystals *. Elephant ears are perennial in USDA zones 9 through 11 but often are grown as annuals. Chewing or ingesting plants that contain oxalates can irritate the lining of the mouth and tongue and may lead to throat swelling and breathing problems.

Allergy-Causing Plant Oils

Poison oak (*Toxicodendron diversilobum*) is an illustration of a plant that contains oils that produce a nasty rash, or contact dermatitis, in vulnerable people. Poison oak is a woody vine or shrub, thriving in forests and open areas in USDA zones 7 through 10. Some birds will eat the fruit and may spread the seeds. Just touching any component of poison oak can result in a rash. Clothing, tools or pets contaminated with small amounts of poison oak oils may also produce an allergic response. The smoke from burning poison oak can create severe breathing problems. Not everyone develops an allergic reaction to poison oak; roughly 15 to 20 percent of people are immune to its oils.

Plant Poisoning Treatment

Get familiar with toxic plants that could be growing in your garden or neighborhood. It helps to learn their scientific names since common names may misidentify a plant. If a child — and it generally is a child younger than 6 — contains ingested parts of an extremely toxic plant, then call a physician or the Poison Control Center immediately. The signs and result will vary with the amount of plant material ingested. Everybody is at risk of getting skin allergy or allergic reactions from toxic plants. To prevent skin irritations from oxalates-containing plants, then wear garden gloves when working around them. To stop or decrease an allergic rash after contacting a plant like poison oak, wash the affected skin area with isopropyl alcohol or soap and cold water. Warm water may cause allergy-causing oils to penetrate even deeper into the skin. Apply anti-itch medication to the affected area. See a physician if you develop a severe rash.

See related

Are Miticides Effective on Eriophyid Mites?

Even though miticides efficiently kill the microscopic arachnids called eriophyid mites, the following substances are seldom a smart selection for handling eriophyid infestations. Chemical controls, such as broad-spectrum miticides, can worsen the problem and result in greater damage from eriophyid mites and other insects. Targeted, less-toxic tactics deliver better results if eriophyid mites invade your yard.

Realizing Eriophyid Damage

Plant damage in eriophyid mites shows up in lots of ways, such as bronzed and blistered leaves, deformed growth, along with galls on leaves, stems, buds and blossoms. The unsightly damage generally causes no long-term damage to plants. Native mites exist, but nonnatives are introduced, too. Distinct eriophyid species target certain plants while leaving nearby plants untouched, often going undetected until damage grows. The best weapon against eriophyid mites is a healthy population of beneficial predatory mites. In some cases, eriophyids function as a food source which will keep valuable mites encompassing.

Limiting Broad-Spectrum Miticides

Broad-spectrum miticides kill eriophyid mites, but don’t stop there. Miticides kill all types of mites and may damage beneficial pollinators. Predator mites that kept eriophyids under limited and control dangerous mites, such as spider mites, get killed together with the objective. With predators eliminated, rapid reproduction rates fuel mite populations. Some miticides actually stimulate spider mite production. Even though a broad-spectrum chemical eliminates one eriophyid generation, it produces a predator-free environment for mites that hurt more than just the way the plant appears. Once eriophyid mites get to the gall phase, no treatment is successful. The galls protect the mites inside.

Utilizing Lower-Impact Pesticides

When chronic, unchecked eriophyid populations threaten your plants, horticultural oils and insecticidal soaps may help. Female eriophyids overwinter, then emerge near spring bud break to feed and lay their eggs. Timely applications limit the damage to handy predators. Spray ready-to-use horticultural oil or insecticidal soap seven to ten days before bud break and again as bud break occurs. Cover all surfaces completely with the spray, such as leaf undersides, since the spray must speak to the mites. Spray on wind-free bearings with temperatures between 40 and 90 degrees Fahrenheit, rather than squirt water-stressed plants. Wear gloves and safety goggles, and prevent all contact with exposed skin. Wash your hands thoroughly with soap and water after spraying.

Maintaining Mites in Assess Naturally

Biological and cultural defenses restrict vulnerability to eriophyid mite damage. Encourage predator mites and reduce chemical resistance in insects by not using miticides. Plant mite-resistant cultivars, when accessible, and choose plants well-suited to your climate and soil. Make sure that your plants get the water and fertilizer they need because healthy plants resist pests and diseases better. Eliminate heavily infested plants in the garden, or even prune out affected branches. Eriophyid mites typically spread by wind, but they can travel to dirty garden tools. Sterilize pruning tool blades by wiping them with family disinfectant before and after every cut. Bag and dispose of eriophyid-damaged prunings to avoid spreading diseases or mites.

See related

How Shield Daisy Petals From Earwigs

When you are half crazy over the love of daisies, having earwigs chew your darlings’ petals ragged won’t do. Among the countless daisy varieties, sturdy Shasta daisies (Leucanthemum x superbum) perennial in U.S. Department of Agriculture plant hardiness zones 5 through 9 are specific earwig favorites. By bringing tachinid flies to prey on their petal-munching 23, in one of the ironies of Mother Nature , Shastas avenge themselves.

Assessing the Intruders

Check that they are actually accountable, before blaming European earwigs — that the species in Mediterranean climates — for the harm to your daisies. After dark shred daisies Much like snails, slugs and earwigs. The petals are typically eaten by earwigs, but slugs and snails eat foliage and stems, leaving shiny slime trails. Examine your plants at night by flashlight to ascertain the culprits.

Send Them Packing

Maintaining earwigs off your petals starts with keeping them. Earwigs spend their days sheltering in damp places. Your garden mulch , logs, dense ground covers or blossoms, heavy weeds and even rocks might be shielding hundreds of the pests. As you can, Eliminate as many potential hiding places, water through the day and keep the mulch as dry as possible. To other places, you may be abandoned by the earwigs without pay that is daytime.

Trapping Approaches

The next best thing to removing earwigs’ hiding places that are real would be to tempt them into ones. Remove by a small cans of tuna. Sink the cans that are open up to their rims in the soil around your daisies, in which the pests can dip into them and float. There is A less pungent alternative to wet several 1-foot spans of rubber hosing and scatter them near the daisies to your earwigs to conceal in after feeding. Shake the bugs into a container of water.

Conquer’Em With Bait

Create slow-acting earwig bait of 1 teaspoon of boric acid powder 2 tablespoons of oat bran. Place it into a box with pencil holes punched along the sides. Set the box near the daisies and pay it with a plate. Earwigs eating the bait take as much as a week to die.

Fight ‘Em With Flies

Flies are featured by the ones if earwigs have migraines. Tachinid fly larvae tunnel into after hatching from eggs their moms paste to the insects and devour them in the interior. What look like houseflies feasting on your own daisies’ nectar are your personal pressure. To boost the flies’ numbers, scatter yearly golden-yellow plains coreopsis (Coreopsis tinctoria) and white, pink or reddish cosmos (Cosmos bipinnatus) among your daisies.

In Defense of Earwigs

Unless your tattered daisy petals have you in tears, then consider the benefits earwigs bring into the garden. They prefer to consume the aphids that distort, other crops and yellow stunt and wilt daisies. Essentially harmless to people, earwigs are very likely to pinch just if sat inside clothes trapped. They also eat decaying organic matter, therefore its decomposition is sped by adding them.

See related

How to Set Linoleum Tiles on Concrete

If your real estate investment has a basement or living room with concrete floors, you may want to install linoleum tiles across the cement heat up the area and to add interest. When you consider linoleum, you may recall geometrical patterns and 1970s schemes, but modern linoleum tiles resemble granite, marble and woodgrains. Linoleum tile installation demands measurements that are proper and tiles to guarantee a smooth flooring surface that is functional and modern.

Snap a chalk line from the middle of one wall into the middle of this wall that is parallel. Snap another chalk line from the middle of the vertical wall into its wall that is parallel. This creates four flooring segments that are equivalent.

Lay loose linoleum tiles in all directions from the middle point. Examine design and the fit of the tiles. If the tiles do not fit and there are tiles that you want to reduce bigger than 1/2 inch across the room’s perimeter, reposition your centre starting point. Re-snap the chalk lines to adapt to the new design.

Apply latex adhesive, with a notched trowel, to the centre intersection. Avoid covering the chalk line. Press it in a portion of the adhesive over the middle chalk line As soon as you place your tile. Apply latex adhesive in 2-foot squares as possible work. In each quadrant, row by row, working toward the wall on all four sides secure the tiles. Follow the directions on your latex adhesive to be sure you use the correct quantity of mix on the tiles.

Cut the linoleum in the wall using a utility knife. Guarantee that the linoleum slides under any baseboards. Cut the linoleum so that it’s flush against the walls or slides under the little crack in the wall where the wall meets the ground.

Roll the tiled surface using a roller. The pressure prevent undesirable bubbling, warping and peeling of the linoleum and will fasten the tiles into the ground. Make sure that the flooring manufacturer doesn’t discourage rolling your brand and version of linoleum with the roller.

Allow the linoleum prior to putting furniture to dry. FindAnyFloor.com recommends letting the linoleum adhesives cure for 24 to 72 hours. Avoid walking round the linoleum-tiled surface.

See related

Recycle and Reuse Home Decorating Ideas

New homeowners attempt to find cost-effective strategies to decorate their new abodes to suit their own fashions. Redecorating can be pricey, but by recycling and reusing items in the previous house or items offered to you by family and friends, you can save money and make one-of-kind house decor.

Throw Pillows

Throw pillows can add style to a living room couch, office chair or mattress. Use old curtains, blankets, clothing and tablecloths you presently have in your dwelling. Select cloths of patterns, textures and colours. Cut on 18-inch or 16-inch squares. Use 1 square to the other for the back and the front of the pillow. Materials the squares feathers down or polyester filling. Use a sewing machine to attach the squares and seal in the meeting.

Jeweled Magnets

As opposed to throwing off old jewelry or keeping it concealed in your jewelry box, you may use it to make decorative magnets to your fridge or house communication center. Magnets come in handy for holding mail, important notes, to-do lists, business cards and children’s art. “Country Living” magazine suggests utilizing needle-nose pliers to remove the backs of jewellery pieces like brooches and rings. Employ magnets–which you’ll be able to purchase from the craft shop or remove from your present refrigerator magnets–into the backs of these jewelry pieces using super-strength adhesive. Allow the pieces dry for 24 hours.

Paint

Add appeal and style into old furniture by sprucing it up with a coat of your preferred color. Whether you’ve got old furniture passed down from family members or bits you picked up at a yard sale, paint can transform them and give your house a new look. Reusing old furniture rather than purchasing new can help maximize your decorating budget.

Coffee Can Wine Rack

If you entertain often or are a wine connoisseur, you know the importance of a wine rack. Wine racks can be pricey, however you can make a cost-effective”green” wine rack utilizing empty coffee cans. Remove and bottoms from coffee canisters. Paint the containers using spray paint or leftover paint you’ve got from another project, and cover them with cloth or leave them as is, using their routine packaging as a design component. Allow the cans dry before you start making your rack. “Real Simple” magazine suggests using powerful glue to connect the headphones to one another. You can produce a pattern that is suitable for the décor of your house. Allow the cans dry completely before inserting the wine bottles. This piece is guaranteed to start conversations among your guests.

See related

Have a Blooming Winter: How to Force Amaryllis Bulbs Indoors

The art of tricking a bulb to flowering inside is called pushing, though with the amaryllis bulb, “coaxing” could be a more fitting term.

Ordinarily with most bulbs, even as soon as you induce them to blossom inside, their energy has been invested and it is unlikely they’ll ever flower again. But this is not true with the rugged amaryllis, which can be forced year after year when planted in dirt. It generates better outcomes because it ages. Compared with the narcissus bulb, which is hands down the easiest flower to induce, amaryllis comes in second, but it is actually the star of the show on account of its dramatic clusters of large blossoms you will look forward to loving each winter.

XOJY

Amaryllis, which can be purchased as bulbs in the fall or as flowering plants in December, is becoming a favorite year-end gift. Prized for its openness to produce large lily-like trumpet blossoms, which generally last inside for several weeks, amaryllis is a fabulous choice for holiday centerpieces. Meanwhile, potted bulbs, if in bloom or on their way, make fantastic gifts which are simple to put together.

A stunning blooming amaryllis has four blossoms atop every 12- to 24-inch straight stem, usually with a base of leaves, even though they’re missing. While glowing red is the most popular color, amaryllis flowers range from white to deep red; unique striped varieties are also offered.

Chris A Dorsey Photography

Since the plant’s blooming performance is influenced by the size and condition of the bulb, the cautious bulb choice is the first step toward success.

Tips for choosing bulbs:
Select the largest bulbs available, because they will produce more than 1 stalk (and blossoms) the first year. Smaller bulbs will generally produce one stalk the very first year. So while the bigger, softball-size, bulbs are more expensive, they’re a worthy investment.The bulbs should be firm and dry, with no sign of rotting, decay or mold. Examine them carefully for signs of harm that could influence their performance.Store newly purchased bulbs in a cool, dry place with good air flow until they are planted. What You Will Need to plant a brand new amaryllis bulb:
One amaryllis bulb per 6- to 7-inch kettle, or set three bulbs together in a 10- to 12-inch container.A pot marginally bigger than the bulb (1/2 inch to two inches around the sides of the bulb)Well-draining potting mixA bamboo stalk or support structure

Barbara Pintozzi

How to Force Blooms

1.
Choose a plump bulb which has some roots in the base along with a kettle that’s only large enough to get the bulb (or bulbs) — that the bulb should feel crowded to bloom.

2. Gently fill the pot with potting mix, then position the bulb so the top third is exposed once you add more potting soil. Add a bamboo bet or artful construction to the soil beside the bulb. This can help prevent damage to the bulb and roots afterwards as soon as the plant may become top heavy and need assistance. Water thoroughly and make sure that the water drains out of the kettle.

3. Set the pot in bright, indirect light and keep the soil moist but not wet. Water only when the top inch or two of the potting mixture is dry to the touch. Overwatering in the start of the expansion cycle is the main cause of failure.

Do not fertilize the bulb until it begins to grow. After expansion appears, fertilize plants with a half-strength saltwater fertilizer each two to three weeks.

Infinity Design, Inc..

Keep the plant in room temperature, above 60 degrees Fahrenheit. The warmer the temperature (70 to 80 levels day and night is perfect), the quicker the bulb will sprout and grow. Watering with warm water or providing underside heat (by putting the pot onto a propagation mat or on the surface of a fridge or warm appliance) may help stimulate expansion.

Inside two to eight months (maybe more), a thick flower stem should take up. Flat leaves will follow as the flower stem develops. Some types of amaryllis require more time to sprout than many others, so be patient. Check to make sure the bulb has remained firm, and do not overwater.

Rotate the pot slightly every few days so the flower stalk receives consistent exposure on all sides and thus grows straight. Move the plant from direct sunlight once the flower buds begin to show color.

Ensuring Future Blooms

Unlike most other forced bulbs, amaryllis will bloom every year, given proper care. The secret to successfully developing amaryllis: Keep the plants growing after they’ve finished blooming, as flourishing leaves provide necessary nourishment to the bulb.

1. Cut person spent blossoms off as they wilt, so the plant doesn’t waste energy trying to produce seeds. Following the bulb finishes flowering entirely, cut the flower stalk near the bottom but keep the leaves intact. Some experts recommend leaving the long stalk intact until it yellows, as it manufactures food that’s stored in the bulb. (The long bowed leaves of this amaryllis make it an attractive houseplant even without blossoms) Keep the plant moist and fertilize regularly.

2. In June, or when there is no possibility of smoke, you can place the amaryllis outside for summer time if desired, preferably in its pot to protect it from insects. Acclimate the plant to the outside by putting it in color or indirect light before gradually moving it to a glowing place or backyard bed where it will get whole sunlight for at least half an hour each day.

3. Water often so the plant doesn’t dry, and continue to fertilize. Leaf growth may continue, and it is a good indication that nutrients in the leaves will nourish the recovering and growing bulb.

Filmore Clark

4. Stop feeding and watering in August or September, and Permit the plant to dry out completely from Sunlight. Bring the plant indoors before the first frost, and eliminate dead leaves at the top of the bulb’s throat, while departing live leaves intact. Keep the bulb in its own pot.

To promote the bulb to blossom again, plants which were cared for in the above mentioned manner should be forced to go dormant by mimicking their life span. (Alternately, some farmers have flowering success with amaryllis plants which are kept inside and green yearlong, though flowering will probably be less predictable and according to the plant’s inner calendar, not yours.)

5. Set the potted amaryllis at a cool (55-degree), richly lit place, such as a cellar, for six to eight months. (Some specialists recommend eight to 12 weeks.) Do not water the bulb. As the leaves yellow and wither, cut them off in the surface of the bulb’s throat.

6. Finish the dormant phase and begin the milking procedure six to eight months before you need blooming to occur. Cut any dead tissue off the bulb’s throat, and then replace the upper 1/2 inch of dirt. At this stage some advocate not removing the bulb out of the pot, although others eliminate the bulb to shake free old dirt and tear off any bulb divisions (called clones), that need to be separated by the mother with some roots.

Care for all these small divisions because you would a full size bulb, and they also can blossom within several decades. Water the potted bulb thoroughly and place the pot at a place with a normal indoor temperature.

Gardening with Confidence®

Additional tips for effective amaryllis expansion:

Amaryllis may be potted in soil or increased in water onto a bed of stones, but bulbs increased in water generally can’t be forced in subsequent years.After that the amaryllis has finished flowering, place it at the brightest possible place inside. In summer fertilize with a balanced houseplant fertilizer per day to aid the plant build nutrients up for flower production the next year.Some bulbs may not have the power to produce flowers every year. Continue to care for the plant so the leaves will nourish the bulb for next year’s flowers. If a bulb indicates no green growth out of forcing, gently squeeze the potted bulb below the dirt surface. If the bulb is not firm, it may be rotten and should be discarded. Rotting can indicate a bulb obtained too much watering.

See related

A 1898 Church at Wisconsin Finds Resurrection

Despite its dilapidated facade, architect Kurt Melander immediately spotted this Wisconsin church’s architectural value. Set in the midst of a large field in the magnificent northern Wisconsin landscape, this 1898 church was once a gorgeous portion of the local Scandinavian and Lutheran community. But after years of fail (it had been decommissioned in the early 1980s), it had fallen into complete disrepair. Melander purchased it for a steal at $25,000.

In the get-go Melander decided to conserve as much of their original craftsmanship as possible, while turning it to a house. Replicating the details he could and paying tribute to the original structure in his new layout, he transformed this old church into a suburban area that honors its history. “It felt great,” he states. “It felt as though I had been doing something important for the community.”

at a Glance
Developed for: Kurt Melander
Location: Northern Wisconsin
Size: Slightly less than 2,000 square feet
Price: $260,000

Melander Architects, Inc..

The church had no indoor plumbing or electricity, but Melander was struck by its scale and volume. “It was a stunning volume,” he states. “The proportions are just beautiful.”

Exterior siding: painted plaster clapboard; roofing: green asphalt shingle

Before Photo

Melander Architects, Inc..

BEFORE: Despite its magnificent original structure, the arrangement was in bad form. The roof needed to be replaced almost instantly, costing Melander about $15,000. Even though the original roofing was made out of cedar shake, the current fire code banned this, so Melander chose classic green asphalt shingles.

Unfortunately, much of the clapboard siding had rotted off too. Melander took off several intact pieces and had new ones custom milled to match the originals for a total of $12,000. Structural fix for the bell tower came for about $8,000.

Melander Architects, Inc..

Melander wanted to keep the clapboard church quintessential feel. “It felt extremely important to not touch that whatsoever,” he states. All the original windows were replaced using closely replicated double-paned duplicates, coming to about $23,000 complete. Just a few new windows — done in early-20th-century proportions — have been inserted into the rear side to the bedroom and bathroom.

Melander Architects, Inc..

The original front doors open to an understated entrance full of light. Although background after hung in specific areas of the inside, it was brittle through the years and could not be uninstalled. Melander opted for simple white instead.

Before Photo

Melander Architects, Inc..

BEFORE: The oculus above the entrance in the bell tower is also an original feature. It faces east and after bombarded the church with light on Sunday mornings.

Melander Architects, Inc..

The tower contains three distinct levels: the entrance, a painting studio inside the oculus and storage on very top. A ladder on the upper level leads outside to a deck with amazing views. Inside, Melander built a ladder and platform to access the small studio.

Melander Architects, Inc..

The 80-square-foot studio has a clear perspective of the surrounding property. The church is comparatively isolated, but a couple of farms could be viewed at the distance. A small ladder on the opposite side of this room contributes to the next level.

Melander Architects, Inc..

The original church was entirely open, so Melander featured a few barriers for solitude. The vertical fireplace gave him a room for the kitchen along with a staircase to a new upstairs attic, but it will not divert from the church’s degree. Instead, the vertical element exaggerates the ceiling height and imitates the bell tower outside.

Before Photo

Melander Architects, Inc..

BEFORE: Melander found a false ceiling was put up at a certain stage, disguising the church’s true height. Tearing down the dilapidated wood and insulation shown an 18-foot-high ceiling.

Melander Architects, Inc..

AFTER: Melander was careful to keep up the old when adding some new features. The trimming and window details have been custom matched to the initial layout. Yellow pine heartwood, 120 years old and reclaimed from old ship beams, lines the primary floor.

The majority of the remodel — almost $130,000 — went towards building the new inside, including sheet rock, insulation, new finishes and paint.

Demolition additionally revealed some surprises from the church’s past. Many churches built during this period had a Bible built into the foundation. During the remodel Melander found that it was excavated out after the church had been decommissioned. He also discovered a number of old coins along with a knitting needle that had fallen beneath the floorboards.

Shutters: painted plaster; bench, armchairs, love seat: classic

Melander Architects, Inc..

Behind the fireplace a steel and apple plywood stairs leads up into the lofted bedroom and bathroom.

Melander Architects, Inc..

Translucent blue vinyl hangs on steel rings outside the narrow windows in the bedroom. Melander cut these openings to permit light from the bedroom west window to flooding the primary living space beneath the loft. Since the vinyl is fastened only on top, it waves gently whenever a breeze comes in from the exterior. “The layout was also a nod to an imaginary organ, together with all the ‘pipes’ ascending upward,” states Melander.

Bedroom flooring: white mosaic Daltile; sconces: Artemide Tolomeo Sconces

Melander Architects, Inc..

White mosaic tile flooring proceeds in the adjacent bathroom. Melander discovered this 20th-century French bath at a salvage store in nearby Minneapolis.

Putting in septicsystem, electrical and plumbing systems for the church turned into a big investment, totaling to about $52,000.

Toilet fittings: Chicago Faucets

Melander Architects, Inc..

Downstairs the kitchen is simple but practical. Melander didn’t want this new necessity to interfere with the main space, but he also needed it to be readily accessed. Tucking it behind the stairs and fireplace helped accomplish both. Sconces behave as task lighting when required but also provide ambient lighting mirrored up toward the ceiling.

Sink: Bobrick commercial stainless sink; cooker: Garland commercial range

Before Photo

Melander Architects, Inc..

BEFORE: From the outside the church looks exactly the same, which is exactly what Melander wanted. “I just wanted to allow the envelope be,” he states.

Melander Architects, Inc..

AFTER: The church is set on a distant 3-acre property; only woods and farmland could be observed from its front.

More: From Olden Church into a Soaring Modern Marvel

See related