Month: May 2022

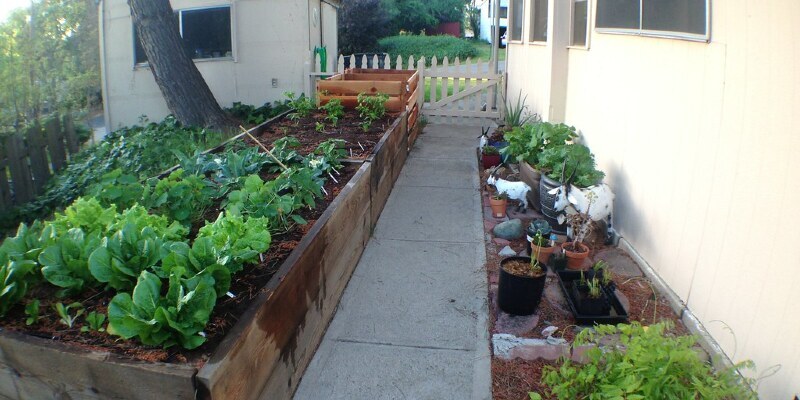
How to Plant Vegetables Following Weed Killer Application

Both preemergent and postemergent weed-killing herbicides can be utilized from the garden bed prior to planting to remove weeds. Preemergents are utilized to kill seeds before they germinate, while postemergents kill existing weeds. More than one kind of herbicide is generally needed to kill all of the types of weed from the plot. Make sure when buying an herbicide for garden use that it’s labeled for that purpose, as garden traceable will dissipate from soil faster to speed up planting times.

Read the label of the herbicide or herbicides you utilized. The label will give you a recommended time to wait prior to planting. The time might be as little as a week, or over a month.

Think about the vegetables you will be planting, and check the label for certain references about those vegetables. Some are more sensitive to herbicides compared to many others. For instance, when using glyphosate, peppers can be implanted sooner than tomatoes.

Wait the indicated length of time until it’s safe to plant prior to adding amendments to the soil. Some amendments like manure might hold absorb the herbicide and keep it from dissipating as fast as it needs to.

Eliminate mulches which might have come in contact with the herbicide, since they might be contaminated after the protected planting time and leach the herbicide back in the dirt. Use fresh mulch, nor apply it until it’s safe to plant.

Plant vegetables normally and add fertilizers as needed once it’s safe to plant, according to the herbicide label.

See related

How to Hardscape a Front Yard

Patios, stone beams, retaining walls, pergolas, fences and driveways are hardscaping elements used to create an appealing and usable outdoor living room. Hardscaping can be integrated into a garden or can be used as the chief landscaping instrument in areas where grass lawns and other plants are hard to grow. This is particularly helpful once you want a welcoming front yard but only can’t get grass to remain nice. Hardscaping is simple as soon as you learn a few straightforward hints and tips.

Plan your hardscape on paper to make sure you like it and it’s feasible. Take into account how the distance will flow and be the most useable in addition to any obstacles you may face. Concrete driveways and underground fountain plumbing, for instance, cannot be placed beside a massive tree with roots near the surface, like poplar trees (Populus). Work with the existing landscape elements whenever possible to save time, money and maintenance.

Eliminate any present grass, plants or weeds located in regions you want to hardscape. Huge rocks and boulders should even be eliminated unless you plant to incorporate them in the plan.

Check with the local utility company prior to digging, then install any hardscape elements that need digging, like pergolas, fences, retaining walls or drainage pipes.

Excavate areas where you’ll install gravel, bricks, concrete or pavers. Dig deep enough to accommodate the height of this material in addition to its foundation. Compact and level the ground to ensure the foundation is firm. Lay weed barrier spread and down a 1-inch foundation of polymeric sand above the region. Put your hardscaping ground elements above the prepared base. Fill the joints of bricks and hardened with sand. Cure poured concrete.

Insert green elements like potted plants, raised flower beds, or groundcovers between the stones of a walkway to soften the layout. Include as much or as little greenery as you like and can keep in your layout, but make sure you add at least a few softening touches against your hardscape.

See related

Reviving a Dead Yard

If you care for your lawn, then you likely work hard to keep it lush and green. It can be frustrating when brownish patches or dead grass appear despite your best attempts to keep your lawn and keep it healthy. It may be possible to revitalize your lawn and fix the dead patches, although in cases of serious damage you may need to begin over from scratch.

Insect and Disease Treatment

If the harm to your lawn was caused by insects or disease, it may be tricky to revive the lawn until the underlying problem is treated. Consider grabbing a tuft of this grass and pulling up it; Utah State University Extension notes that when the sod pulls from the ground such as carpet off a ground, then you likely have grubs or other insects affecting your bud. These can be treated with insecticides. If it doesn’t, start looking for wilting, discoloration or other signs of infection near the edge of those dead areas in your lawn. If you don’t see definite signs of fungal growth, don’t use a fungicide to treat respiratory bud; several lawn diseases are short, so you will save yourself money and therapy time simply by letting the disease run its course and then fixing your lawn afterward.

Soil Testing

If your soil pH is too acidic or too alkaline, then bud might have trouble growing in your lawn. Examine the dirt having a testing kit or have it professionally tested to determine its pH. If the pH is high, you can decrease it by adding powdered sulfur to it, while low pH can be corrected by adding lime or other acidic substances. Add only a small amount at one time in accordance with package directions, watering or tilling the ground if necessary to help soil penetration.

Fertilizing and Watering

Grass needs water and nutrients just as with other plants. Excessive dryness or nutrient-poor dirt can harm grass, resulting in weakened or dead patches in your lawn. It is possible to use a nitrogen-rich liquid fertilizer or slow-release fertilizer granules, or until the soil to a depth of three or four inches and add organic materials to supply nutrients for your grass. If the soil appears to be dry, water the grass to provide much-needed moisture which can revitalize the present grass and assist new grass to grow.

Dethatching and Aeration

A buildup of thatch on your lawn can block sulfur and water from getting to the roots of the grass while choking out the grass itself. Running a dethatcher via your lawn or manually removing thatch using a rake eliminates the dead stuff to maintain your grass out of being suffocated. Aerating the soil also can help to encourage grass growth as it punches small holes in the ground which allow air and water to more easily penetrate the dirt.

Reseeding

Applying grass seed in dead areas that you have cleaned up assists you to revitalize your lawn by allowing new grass to replace the old. Eliminate the old grass and seed the bare place. If you choose to until the dead areas to add nutrients to the soil, seed the newly tilled soil and cover it with wax or other protective coverings until the new grass begins to grow.

Restarting

If your lawn is heavily damaged, then you may have more success killing from the remaining grass using an herbicide. After that, until the ground around 6 inches deep to break it up and add new nutrients. When the soil is prepared, reseed the entire lawn and start developing a new lawn from scratch. Take care to avoid traffic in the lawn if possible while the new grass is growing to prevent harm. For quicker results, you might consider having sod installed when the old grass is gone.

See related

The best way to Root Honeysuckle

Honeysuckles (Lonicera spp.) Really are a smart choice when you need quick coverage from a highly perfumed, vigorous growing, scaling or shrubby plant. Honeysuckles make your landscape come alive with their vibrant color and ambrosial, mildly erotic scent which attracts hummingbirds, bees and butterflies throughout summer. You can begin your honeysuckles inside in early spring by spreading, or rooting them, by planting a wholesome stem by a sturdy, well-producing plant in a fertile growing medium.

Mix together 1 gallon of sphagnum peat moss, 1/2 gallon of coarse perlite, 1/2 gallon of coarse vermiculite and 1 tablespoon of dry, controlled-release 10-10-10 fertilizer at a bucket using a garden fork. Propagating mixes such as this function well for transplanting, germinating and rooting plants because they are sterile and the components have a comparatively uniform shape, weight and texture.

Pour 1/2 gallon of propagation mixture at a 1/2 gallon grass and water until it drains. The growing medium should be moist but not wet. Place the remaining mixture in a sealable container and store in a cool dry place until ready to work.

Wipe the blades of the garden shears using a lint-free cloth moistened with isopropyl alcohol.

Cut a hardy honeysuckle stem just above a pair of healthy leaves using the shears. Make another cut halfway between the next lower leaf joint onto the stem. The growing tip — which part of stem inserted in the spreading mix — should be between 2 inches and 6 inches long. This cut is referred to as a double-eye cutting, as the two opposing leaves resemble the ovoid shapes of a pair of eyes.

Lightly moisten the bottom 1/4 inch of the honeysuckle dip and cutting it from IBA rooting hormone powder. Shake the excess hormone powder in the cutting.

Dig a little hole at the propagation mix that has a little garden trowel deep enough so the cutting edge may support itself without falling over. A good step to go by is digging one-fourth as deep as the cutting edge is extended. For instance, if the cutting is 8 inches long, dig a 2-inch-deep hole at the mixture.

Insert the cutting at the grass and backfill the hole with the mixture, tamping it down quietly. Cover the honeysuckle and the grass using a plastic bag, then securing it with a rubber band near the bottom of the pot.

Place the plant in a space with a temperature between 75 and 85 degrees Fahrenheit. The honeysuckle will take root in about four to six weeks, and then you’ll be able to transplant it outside. Gently tug on the stem to sense for root resistance, ensuring the roots have begun to form.

See related

Container Recipe for Geranium Plants

Geranium plants (Pelargonium spp.) Insert bright color, texture and scent to container plantings when among the six big geranium groups is included in the grass. When thinking about geraniums, the zonal geranium (P. x hortorum) most often comes to mind. But other groups include ivy-leaved, angel, regal or Martha Washington, scented and distinctive. Trailing species, such as ivy-leaved geraniums (P. peltatum), add dimension to window boxes and hanging baskets. Scented species offer a sensual encounter beyond visual appeal. All geranium species are half-hardy and require protection when temperatures fall below 36 degrees Fahrenheit. A container recipe for successfully expanding geranium plants includes provision of full sun, a cool root zone, good drainage and a slightly acidic potting mix.

Base Ingredients

Container recipes for growing geraniums are either soil-based or soilless. Soil-based recipes contain one-fourth to one-third garden dirt. Recipes using one-fourth dirt also utilize one-fourth peat moss, coir — coconut hulls — or other similar stuff. Both peat moss and coir decompose gradually, supplying nutrients for healthy plant growth. Peat moss has a pH of approximately 4.0, requiring the addition of stone to raise the potting mix to a pH level between 5.5 and 6.5. Soilless mixes use peat moss, coir or a similar material as the base ingredient.

Drainage

Geranium plants are subject to mould (Botrytis cinerea), black leg (Fusarium sp.) And black stem rot (Pythium splendens) when the potting medium remains wet and dries out gradually. Excellent drainage is essential for a successful potting mixture recipe, which ought to contain one-fourth to one-third non-organic substance to increase drainage. Fine Gardening specifies perlite as a high-fired volcanic rock that lightens dirt and creates pockets for air and water flow. Coarse river mud also allows for drainage and aeration while supplying a press upon which roots may cling. Playground sand increases friability, or looseness, of a potting mixture. Selection from one of these materials depends upon accessibility and personal option.

Organic Matter

Organic matter offers slow-release nutrients. Compost, composted manure, worm castings, leaf mould and composted pine bark are acceptable as one-third to one-fourth of the quantity of a geranium potting mix. Composted products are not all equal, as organic matter and composting methods vary widely. Just well-composted manure should be used at a container recipe for geraniums.

Amendments

When potting recipe ingredients are thoroughly blended and slightly moist, a soil test to determine pH level is taken, following soil test maker’s directions. Ground stone is added based on soil test recommendations to increase the pH to 6.5, the optimal level. A small number of charcoal pellets may be added to each gallon of potting mix to reduce odors related to organic matter decomposition. N.C. State University Cooperative Extension advocates the inclusion of 1/2 teaspoon of lawn fertilizer and one teaspoon of dolomitic limestone per 8-inch container of mixture or according to soil test results. Commonly used garden fertilizers are formulas such as 5-10-5 or 6-12-12.

See related

Tips on Increasing Climbing Hydrangea

You do not see climbing hydrangeas (Hydrangea anomala petiolaris) as frequently as the shrub types, but it’s one of the more stunning members of the hydrangea family. A full-grown climbing hydrangea vine may be up to 75 feet tall and it’s covered with attractive, heart-shaped leaves during summer and spring. The leaves drop in autumn, demonstrating a showy, reddish-brown, exfoliating bark. Fragrant, white flowers blossom in 6- to 8-inch clusters in late summer and spring. Climbing hydrangea is hardy at U.S. Department of Agriculture plant hardiness zones 5 to 8.

Website and Support

Climbing hydrangea grows in full sun or partial shade. The plant isn’t particular about the soil as long as it’s well-drained and not overly alkaline. The leaves turn yellow once the pH is too large. Working powdered sulfur to the soil corrects the issue. You can leave climbing hydrangea to operate across the ground as a ground cover, but it seems its best when it is climbing. Trees and walls make great supports. Trellises have to be hardy to support the huge vines. The vines have strong tendrils that form a firm attachment to nearly any kind of construction. Do not grow the vine against clapboard walls because the tendrils can pull them loose, and avoid walls that require periodic maintenance because the vines do not detach easily. Climbing hydrangea is a great replacement vine for English ivy (Hedera helix), which is an invasive species in many parts of the nation.

Planting

You can plant climbing hydrangea in spring or fall. Make sure the plant sits at the ground at the same amount as it did at the container. Water generously after planting but do not fertilize until the following spring. It may take newly transplanted climbing hydrangea vines a year or two to become established, and thus don’t give them up too soon. Seeds germinate readily but take a few years to put on significant growth. The vines grow quickly once established but it may be three to five years before you visit blossoms.

Watering and Fertilizing

Climbing hydrangeas require 1 inch of water a week, either from rainfall or supplemental watering. During hot summers they may need watering more frequently. Keep the soil moist, but do not water so frequently the soil becomes sloping or mushy. A 2-inch layer of compost in spring provides enough nutrients to encourage the plant all year. You might be able to enhance the performance with a mild monthly side dressing table or foliar spray.

Pruning

Climbing hydrangea is an informal, three-dimensional vine that frequently includes side shoots growing in several directions. This is natural, and part of the charm of the plant. The vines do not require regular pruning except to correct problems. The fragile stems crack and break easily, and you ought to remove damaged components promptly to stop infection. Vines that are allowed to grow beyond their support become top-heavy and may pull off from the break or support. Trim them back in summer, after flowering.

See related

Flowering Cherry Hedge Plants

The sand cherry (Prunus besseyi), a deciduous flowering shrub, is cold hardy to U.S. Department of Agriculture plant hardiness zone 2. The shrub has dark green leaves and grows to a height of 6 feet. You can plant several sand cherry shrubs together to produce a flowering hedge. In the spring, the sand cherry is covered with white blooms later replaced by dark purple edible cherries. Sand cherry resides about 20 decades.

Propagation by Seed

Sand cherry seeds have to undergo cold stratification before planting. The seeds come from ripe cherries, and also are removed, cleaned and dried. They are then placed in moist sand and maintained in a humid atmosphere for 30 to 60 days. After being washed, the seeds should be placed in a plastic bag with a moist paper towel and kept in a refrigerator at 36 to 41 degrees Fahrenheit for 60 to 90 days. After stratification, the seeds are ready for spring sowing.

Propagation by Reducing

Semi-hardwood or softwood cuttings taken in the summer are used to root the sand cherry from cuttings. Several inches are cut from the tip of a stem. The close of the cutting ought to be dipped in rooting hormone and also placed in a small number of well-draining soil to root. Regular misting keeps the soil moist. The cuttings are maintained at 65 to 70 F for four to six weeks before the roots have grown along with the cutting edge can be planted.

Planting Conditions

Cherry shrubs need full sun to correctly set fruit. They won’t grow in the shade. The shrubs endure many soils, however, the very best is a well-draining sandy, loamy soil with a pH between 5.0 and 7.5. They have low water needs and tolerate dry soil. The shrubs should be planted from seed sown 1 to 2 inches below the soil or from cuttings as early in the spring as possible after frosts are no more a threat. A few seeds spaced 2 to 3 inches apart in each location will raise the odds of a thriving plant, and extra plants may be moved or thinned as necessary. Fertilizing having an all-purpose fertilizer according to the label directions will increase plant growth.

Flowering Hedges

For numerous hedges, a 4-foot spacing between plants will provide you shrubs which grow together. Just one shrub is necessary for fruit production, and it’ll begin to bear fruit after about three decades. Insects pollinate the spring-appearing blossoms, and the cherries ripen in the summer. The deep shrub roots can help stabilize sandy soils; the plant is wind-resistant and may be the windbreak. Sand cherries are deciduous, so that they are dormant in the winter months.

See related

When Does the Annual Sweet Pea Bloom?

The sweet pea (Lathyrus odoratus) fills the garden with fragrance and delicate blossoms. This annual climbing vine is a highly scented ornamental closely associated with the common garden pea. Though the flowers are sweet smelling, sweet peas aren’t an edible crop. Sweet peas flower in the summer in cool climates and at the spring and fall in light Mediterranean climates.

Gentle Climate Planting

Sweet peas like to bloom if the weather is cool. In a Mediterranean climate with light — frequently frost-free — winters and warm summers, the best time to plant is in late summer and early autumn. A late season planting contributes to flowers in winter and early spring. For holiday flowers, get your seeds in the ground by Labor Day. You can also plant quite early in the spring to get an early summer bloom time.

Cold Climate Planting

In regions with cold winters where temperatures often fall below freezing, sweet peas are planted in the spring after the last frost date. By early to mid summer, the fragrant flowers are in full bloom in the garden. Sweet peas are best planted right into the garden bed, however, in regions with a long, cold spring, it is possible to start seeds indoors four to six weeks before the last frost date in your area. By the time that the ground thaws, you will have plants already growing to really go in the ground.

Planting Seeds

The seeds should be planted 1 inch deep in moist soil and spaced 2 to 3 inches apart. Sweet peas germinate best in a ground temperature between 55 and 68 degrees Fahrenheit. You can accelerate germination by soaking the seeds in warm water for 24 hours before planting or by gently nicking the seed coat with a pin or knife. Germination commonly takes 10 to 14 days but can be as fast as two to three days once the seeds have been jammed or nicked prior to planting.

Growing Sweet Peas

When planting sweet peas, a spot in the sun where the soil is shaded by other low-growing plants is ideal. It is one reason sweet peas are so happy in the vegetable garden; they can develop with their roots shaded from the other plants and many vegetable gardens are at a spot that gets lots of sunlight. This climbing annual vine will climb a trellis or climb up corn stalks and end around sunflowers.

See related