Month: February 2018

African Blue Basil Plants

African Blue basil is a fragrant and ornamental herb made from from Dark Opal basil (Ocimum basilicum) and camphor basil (Ocimum kilimandscharicum). The unique hybrid features a fragrant scent. It grows in a number of climates including the Climate Zones 14 to 17 of Sunset. Like other kinds of basil, it’s a delicious seasoning when chopped-up for squash dishes, tomato sauces, salads, pesto, chicken and much more.

History and Features

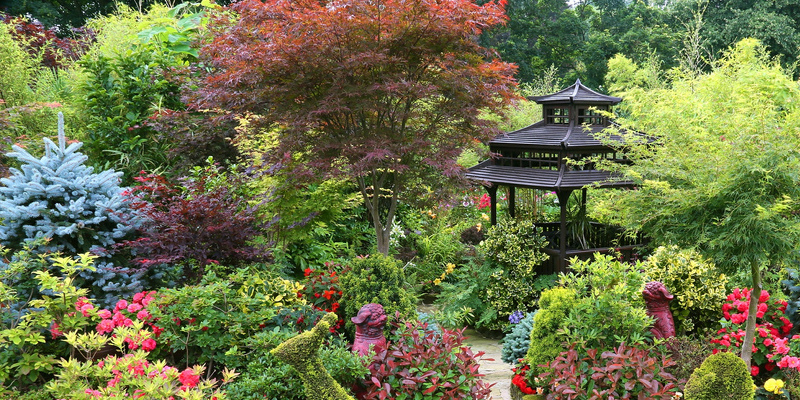
African Blue basil happened accidentally and is a fairly new plant. A nursery operator in Ohio noticed the herb between camphor basil in 1983 and two beds of Darkish Opals. The plant has lavender flowers on long stems and grows into a bush. Its leaves that are appealing start purple out but turn green with purple veins. The fragrance of the plant has hints of camphor, which comes from its camphor parent. The herb attracts butterflies and honey bees. Like several other kinds of basil, it is possible to use the plant for cooking.

Care and Development

Because it can not type seeds it is possible to propagate African basil via cuttings. The sterile, fast growing plant fares best in locations that are sunny and when planted throughout the spring to midsummer in well-drained loam or sand. Plant it in containers which are 10 to 12″ broad or in gardens. Use all purpose fertilizer in the beginning of the period that is growing and again in regards to a month. The plant can increase up to 2-feet tall. African Blue basil is a great companion plant for peppers and tomatoes. It improves the taste of other veggies.

Pruning and Servicing

Cutting crops back and harvesting the leaves assists the African basil increase. Cut and remove flowers stems above leaves. Cut back crops that are tall to help thin. By the end of the period, remove all foliage that is dead and cleanup debris from around crops. Discard and don’t compost diseased portions of the plant. The plant can not endure frost and declines in cold temperatures.

Pests and Diseases

Basil has few natural enemies and is usually disease-free. The pests that assault basil contain flea beetles, aphids, Japanese beetles, snails and slugs. Honey dew is excreted by aphids, and sooty mould grows on the compound. Cut knock aphids off of crops having a forceful spray of water and leaves. Use a copper flashing barrier to ward off slugs, snails and the beetles.

See related

Pros and Cons of an Empress Splendor Tree

Environmental organization World Tree Technologies, Inc., genetically created the tree identified as Empress Splendor, a strain of the Paulownia tomentosa tree that grows in Sunset Climate Zones 4 through 9 and 14 through 24. The company positions the Empress Splendor – a noninvasive number of Paulownia – for industrial lumber cultivation, touting the tree’s quick growth rate and sustainability. Even trees that are created are not ideal, nevertheless, and the Empress Splendor comes with a selection of cons and pros.

Growth Fee

In accordance with World Tree Systems, the the main “pro” of the Empress Splendor tree is its quick growth rate. The organization promises the tree reaches heights of 10 to 20-feet in its first-year and much more than 50 feet in just a decade. The tree may be harvested every 7 to 10 years, supplying lumber that WTT describes as “ultra extended-grain.” Wendy Burton, CEO and founder of WTT, reviews the wood, which resists rot and dampness, re-generates in the stump up to seven occasions following the first harvest.

Other Professionals

Even though the Empress Splendor provides business cultivation, lavender flower blossoms and its purple can lend elegance to landscapes, possibly boosting real estate worth. In bad soil, the tree grows by style. Reaching un- heights between 80 and 30 feet, the Empress Splendor serves as a wind barrier and produces shade. The huge leaves of the tree – which measure between 2 and 3-feet across – act as carbon sinks and offer abundant air oxygenation and will provide nutrient-rich ground mulch, in accordance with WTT.

Pests

Even though the engineers of the Empress Splendor sought to make the tree insect- caterpillars nevertheless target this fast growing specimen. This insect pest feeds on the nutrients and moisture of the tree and can slow its progress. The tree is vulnerable to deer, which might feed on the tops of trees that are young, possibly slowing their progress.

Other Negatives

It could prove prohibitive to hobbyist farmers and home gardeners despite the fact that the huge dimensions of the Empress Splendor can be a boon for timber plantations. The big roots of the tree might harm foundations or walk ways situated within 8 feet of the root-system. In accordance with World Tree Systems, the tree doesn’t tolerate climates and wants well-drained soil for development. It’s also vulnerable to root-rot triggered by standing water.

See related

The best way to Replace a Shower-Curtain Grommet

A shower-curtain occasionally tears over the leading edge, particularly if a person pulls the curtain on the other side of the rod. A grommet that is lacking will make a curtain sag and detract from your area style as well as the curtain’s uniform form. The notions portion of of a shop that is stitching usually supplies grommet kits to assist you change a missing or broken grommet. Joining the grommet and setting a hole will prolong the life span of the shower-curtain to get a look that is fashionable.

Place a bit of felt or fleece on a durable surface, like workbench or a floor, to safeguard the area.

Place the leading edge of the shower-curtain with this .

Place the hole-punch on the edge where you want to insert the grommet that is new.

Pound the hole-punch with all the hammer to produce a round hole in the shower-curtain.

Place the metal-base on the area that is flat.

Fit the grommet using the edge below the hole.

Place the washer using the tough edge down against the grommet. The washer will have the side up. The curtain is going to be between both parts.

Set this grommet on the steel foundation of the kit’s.

Position the extended finishing device on the very top of the assembly.

Pound this device together with the hammer. The grommet’s elevated heart will flatten. Washer and the grommet will grip and join.

See related

The best way to Paint Appliance Handles

Painting the handles in your appliances can give your whole area an up-to-date look. It can hide dingy surfaces which have become worn from most of the day-to day managing. Detach the handles before painting and prepping the surfaces for simpler application of the paint. Protect with masking tape and plastic around places of the the applying and any near-by cabinetry in the event you decide to depart the handles connected.

Remove the screws holding the manage of the appliance’s, using a screw-driver. Screws on a fridge manage while the screws on the manage of a stove might be inside the door might be in the top and bottom of the handle. Refer to your operator guide, if required. Set the screws up on elimination. Alternatively, it is possible to leave the handle connected to the equipment.

Lay a drop cloth in a outside workshop or newspaper. In the event that you are employed in in a garage allow for appropriate ventilation.

Wash the handles to remove grime, dirt and oils. Dry using a towel.

Sand the manage -grit sandpaper if it’s an area that is sleek. This can help the paint stick to to the area of the handle and avoid peeling or flaking.

Wipe away any dust using a tack cloth. If if you have removed the handle from the the applying painter ‘s tape to any location on the manage you do not want to paint. In the event that you depart the handle cover the the applying with painter’s tape and plastic connected. Tape over cabinetry that is near-by as well as in areas across the handle. Use the tape of the painter in places the plastic protect or can not achieve acceptably.

Check the spraypaint to find out whether it’s a built in primer. Coat the manage with the proper primer for its material, should it not. Like, latex-centered primers function most useful on plastic and vinyl handles, while a bonding primer is right for steel surfaces.

Hold the spray-can about 8″ a way in the handle to permit even distribution of the primer. Allow the primer.

Apply a straight coat of spray enamel within the manage area in much the same by which the primer was used by you. Allow the primer. Apply another coat, if essential.

Remove subsequent to the paint has dried entirely, any painter’s tape and plastic sheeting. Reattach the handle to the the applying, if relevant.

See related

The best way to Propagate Raspberry Canes

Propagation is a quick, easy method and never have to begin with a seed to develop new crops. It enables one to locate a wholesome, plant specimen that is verified with berries you tasted and have seen and that means you know everything you will get before you invest time nurturing the plant that is new right into a fresh fruit- . Plants may be propagated several methods, but canes are being cut by the approach. Therefore there isn’t any digging for roots, the canes are collected in the ends of the plant and several canes can be cut by you also .

Choose a stem succulent cane, using a a strong. Cut the stem using a knife 3 to 4-inches in the tip. Cut one stem for every plant you want to begin.

Fill a tiny pot using a combination of sand and peat. Lightly pack the soil and place the pot in a area where it could drain.

Remove the leaves in the bottom 3″ of every cane. Apply root strength to promote root development. Stick the cutting 2″ deep to the middle of the pot.

Mist the bottom of the cane and soil with water several times a day for 2 to a month as the roots develop. The plant is prepared to be moved outside when the roots are established.

See related

Varieties of Culinary Thyme

Thyme crops are compact and evergreen perennials or semi-evergreen. Upright, little shrub, low- mounded, mat and varieties are accessible. The plants produce flowers that are tiny, but flower colour choices are available on the list of varieties and cultivars. Maybe not each is accessible locally while some 400 types of thyme exist, and only a few are fitted to use.

Culinary Kinds

The species Thymus vulgaris is usually called common thyme and contains French and summer, cold temperatures thymes. Thymol is element and the active ingredient of the gas that offers the herb its taste. Neral and geranial give lemon-thyme (T. x citriodorus) its citrus aroma. Lemon thyme cultivars contain Argenteus, Silver Queen, Doone Valley and Silver King. Cultivars are available that evoke citrus aromas, including orange and lime. Cold-tolerant species contain oregano-scented thyme (T. pulegioides), which gets its taste from carvacrol; and caraway thyme (T. herba-barona), which receives its essence from carvone. The names “creeping thyme” and “mom-of-thyme” are frequently used interchangeably for the same crops. Culinary thyme types using the greatest taste are slim-leaf French, broad-leaf English, lemon-thyme and mom-of-thyme, suggests Learn Gardener Joyce Schillen of the Oregon State University Extension Service’s Jackson County workplace. The crops have the greatest taste prior to their flowers open.

Uses

Use dried or thyme fresh and also to herbed butters flavor vinegars, teas, meat dishes, salads and soups. Thyme is one of the elements in the herbes de Provence mix employed in French cooking. Thyme might serve as an ornamental. The crops attract butterflies and bees, the foliage provides look and a stylish scent, and cultivars are accessible. For cooking, keep your crops near at hand. Thyme grows well indoors in a south-facing window and outside. Some crops make excellent groundcovers, on creeping thyme, and also you will walk, but you might not want to use crops developed in a pathway for cooking.

Conditions

Thyme is a Mediterranean herb that prefers warm, dry conditions, but might survive in areas with moderate winters. Thyme grows all through all of San Francisco and its own surrounding counties of the Sunset Climate Zones. The crops adapt properly to the circumstances of the numerous microclimates of the area and the the reduced rainfall; nevertheless, fungal problems may be experienced by plants developed in foggy or coastal places. In case an occasional tough freeze is experienced by your area, briefly protect the herbs using a fabric sheet or mulch to stop harm to the crops.

Soil and Fertilizer

Thyme tolerates bad soils. While soils are most readily useful, soils and sandy soils are excellent for the plants. Thyme require for great drainage and will have difficulty on clay soils due to the roots. Amend the s Oil to offer a pH array of roughly 6.3 to 6.8. Thyme advantages from a mild fertilizer program twice or once annually. Use an allpurpose or half-power watersoluble fertilizer. In the event nitro Gen is applied by you, use only onefourth to half the suggested dose for veggies in your area, indicates the Virginia Cooperative Extension. Using nitro Gen might trigger inadequate taste and rapid-growth.

Pruning and Harvest

Pruning is an essential portion of taking care of thyme. Development is encouraged by it; by eating that which you remove, and you are able to reap the rewards of the chore. Prune thyme by slicing the stems in the first morning following the dew dries as-needed through the entire year for quick use. The parts of the near to the ideas include mo-Re gas-generating glands and provide better taste. Prune thyme for propagation; it is possible to start crops through seed or division. Prune to form plants, decrease legginess and motivate air blood supply. It’s risk-free to prune most thymes harshly, even by one third to one half, one or twice per time, but cease creating substantial cuts once late summer arrives in the event your home is in a colder micro-climate. In locations including Sunset’s Environment Zone 7, the crops require time to re cover before winter established in. Creeping thyme is mo-Re resilient, but with lemon-thyme and thymes with mounding types, abandon a T least a fifth of the plant unpruned, recommends the College of California Co-Operative Extension, which which implies you trim these crops in a method similar to a Mohawk hair cut.

See related

Tips For Pruning Redwoods

Sequoia sempervirens, also called California redwood or the coastline, is a huge coniferous tree that’s hardy to Sunset’s Environment Zones 4 through 2-4. Like the majority of needle- it doesn’t require pruning but have the potential to benefit from an occasional trim of its own branches. Proper pruning can let you manage the dimension of the tree and will stop illness from spreading.

Pick the Best Time

Redwoods get into in the late-winter right into a brief period of dormancy, making it the best time for pruning. This offers them a possibility to recover the cuts you make with their first burst of development in the spring. Pruning works best-in January even in case your location does not get cold at any stage in the year. Light amounts also assist the tree decide when to exit the state that is dormant, as well as the days of April and March will trigger development.

Provide Shade

These branches offer an essential patch of shade, although it might be tempting to trim out the the lower branches across the trunk of a redwood tree. Tiny growths arise from the roots identified as suckers when the root of the tree is exposed to plenty of sunlight. Trimming a way the branches that are shading enables suckers sap and to develop the vitality of your redwood tree. Mulch barrier or a shade fabric allows reduced branches to be pruned a way by you without triggering the development of hundreds of suckers.

Careful Cutting

Shaping the redwood needs one to trim the branch itself rather compared to the clumps of needles as the foliage is spread along each branch. Pruning cuts may be produced at any given point along a branch eliminate a branch that extends past the conical progress routine or to produce a most form. Use trim branches and only shears. Branches should be pruned when they’re lifeless, dis-eased or defectively broken. Remove branches that are such by creating a sequence of three cuts: a cut underneath the branch 6″ in the truck, a full-cut downward about an inch more a-way last but not least a full-cut near the trunk, being cautious perhaps not to graze the branch collar.

Disease Prevention

Leaving several inches of a branch sticking out of the trunk gives the best breeding-ground for ailments and damaging bugs. You need to start by reducing big branches to your length of several inches for better get a handle on, but re-member to trim the stumps near the the top of trunk to stop issues. An easy vertical area prevents water from offering a chance to make it to the heartwood of your redwood tree to rot and gathering.

See related

The best way to Prune a Mature World Willow Tree

The drought-tolerant mature world willow tree (Salix matsudana) will preserve its distinctive world form with effective pruning. When the globe shape was achieved, the willow will offer a stylish year round addition to your own landscape. All willow trees ought to be planted in locations that will accommodate their expanding root-system, which may clog sewage and plumbing lines if planted close to structures. The fast growing tree is adaptable to a broad array of soil problems and can attain of a peak of 50-feet.

Watch the progress of the world willow through the late-winter. When new growth starts begin pruning.

Mix denatured alcohol with 1 cup of water in a bucket. Dip a cloth and wring the fabric out. Wipe a pair of loppers as well as the blades of a hand-saw using the fabric to remove any illness that may be taken from plant to plant.

Cut off all lifeless branches of the world that is mature loppers or willow tree together with the hand-saw. Cut off any branches that have no leaf development.

Determine the branch of the world willow. Cut off any extra aspect branches connected to the branch using loppers or a saw. Cut off.

Cut a 4 inch area in the tips of every healthy branch to promote new development as well as a total look to the world tree.

See related