Month: October 2017

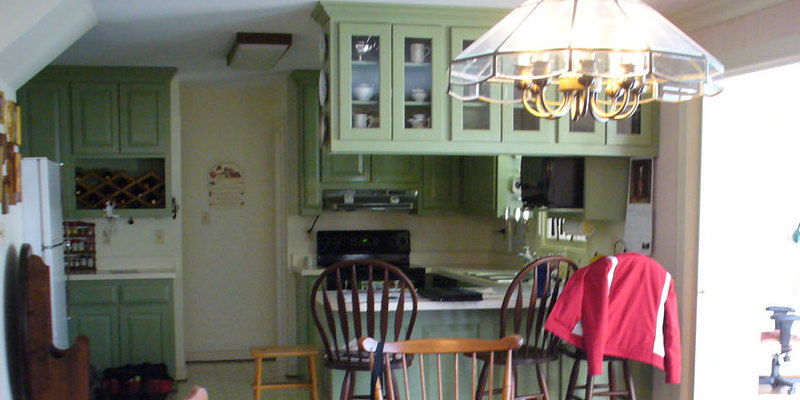
The best way to Install Curtains with No Rod

There isn’t any interior style rule that curtains have to be installed on rods. Designers understand to look that, when full, get the jobs done while incorporating to the area. A do-it- yourself can get the curtains installed, without the installation headache they might trigger as well as rods, by carrying out several tricks of the trade.

Install curtains utilizing eye screws. Measure the total width of the curtain over the leading edge and calculate the the area between the hook positions. Mark the position as well as the total width of every hook on the wall. Use a self-erasing material marking measure and pencil in the floor up to every hook position. Eye screws at every position turned. The curtain hooks, while connected to the curtain, in to the eyes.

Create a system using a 1-by 2-inch board. Draw a line that is horizontal on the wall in the specified top fringe of of the curtainless 1 inch. Indicate equidistant bracket positions 18-inches apart. Install a 1 1/2-inch angle bracket at all the positions, the bracket positioned as an inverted “L,” one-leg against the wall, the other projecting out from your wall. Cut a bit of OF JUST ONE-by-2 board equivalent to the period of the placement line. Staple the curtain into a 1-inch fringe of of the board, concealing the near to any pleats by producing tiny tucks, if required, and producing gathers. Position the board on the very best of the brackets, the THE TWO-inch side of the board resting across the very top of the leg of the bracket. Screw up to the wood to secure the remedy through the brackets.

Drawer pulls the most effective line of the curtain placement over and hang the curtains on such pulls with material loops. Draw a line on the wall in the specified top-of-curtain position plus 4″. Screw drawer pulls into this line a T equivalent distances across the line. Cut one 1 2-inch duration of cloth ribbon for every single drawer pull and tie the ends of every ribbon strip producing a loop. Until each loop is 4 inches long adjust the-knot. Pin the conclusion to the backside of the most notable edge of the curtains. Pin every one of the loops spacing them similarly. The ribbon within the drawer pull to to hold the curtains. To get an appear that is diverse, place the-knot on top of the loop ends.

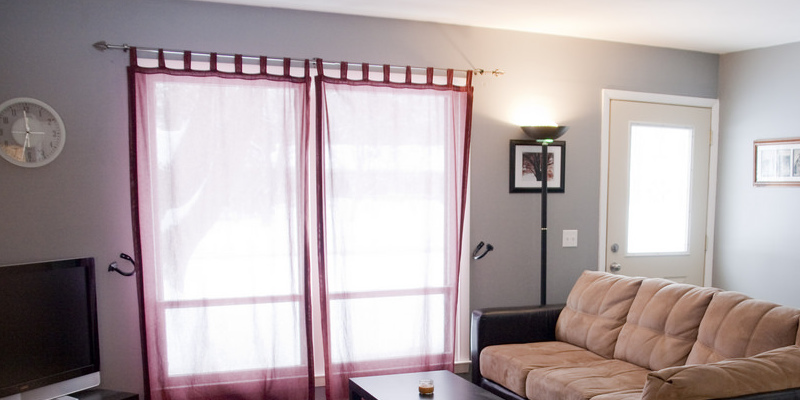
Attach curtains that are flat to the window or wall frame with hook and loop tape. Draw a-line on the wall that signifies the very top of the curtain, the period of the line add up to the width of the curtain. Place a mark on the wall in the middle of the line. Attach the hook facet of self- hook and loop tape to the wall, positioning the tape below the line that is drawn. Cut the loop aspect in to 4-inch strips and attach these to the trunk of the very top of the curtain; abandon 1- . Place a pin in the middle top fringe of of the curtains. By aligning the middle pin using the marked target the placement line to install the curtains, begin. Attach the loop and hook sections of tape in the middle and perform toward each edge that is exterior, retaining the curtain taught to avoid wrinkles in the 1-inch gaps. Remove the center pin.

See related

The best way to Get Rid Of

A door bell may be a suitable thing to own at home, while you could miss someone rapping on the doorway as you can normally hear the ring of the door bell during your whole house. But if you need to replace it using a fresh doorbell, or no more need the door bell, it is possible to take away the door bell pretty easily.

Switch off the circuit to the door bell at the main electrical box of your home’s. Examine the door bell to make sure that electricity was turned off by you to the circuit that is proper. Return to the box and switch off the circuit that is proper, in the event the door bell rings, or the button is lit.

Disconnect the door-bell circuit in the transformer by eliminating the cables and loosening the final screws. On door-bells that are older, the transformer is an outside unit typically installed alongside the chief box. In the unit, the transformer is typically on newer models.

The plate cover on the door bell. Unscrew the terminal screws and disconnect the cables from your door bell. To ensure they do not fall in to it in the event that you are changing the door bell, tape the wires to the outside the wall. Wrap tape, in the event that you are eliminating the door bell and tuck them to the wall. Keep the cables individual.

Take away from your unit. Disconnect the cables in the unit. Examine the cables that go out of your property ‘s primary carton with a tester, in the event the transformer is inside the device. Unscrew the device and eliminate it from your wall. Tape the wires in the event you are perhaps not changing the the machine, as you did with the door-bell button and tuck them to the wall.

In the event you are perhaps not changing the the machine, patch the partitions. Fill the holes with putty and sand it down. Apply a layer of primer and let it dry. Apply let it dry and paint within the regions that are primed.

See related

The best way to Set Up Smoke Detectors on Cathedral Ceilings

Sensors and fire alarms are essential tools in protecting your loved ones as well as you from death or harm as the consequence of a house fire. Most of us are conversant with the best way to put a smoke alarm on a ceiling that is flat, but setup may be tricky for those who have cathedral ceilings at home. Installing a smoke alarm resembles installing on a level ceiling, but particular attention must be paid by you to where you put the alarm.

Study the chamber to look for the most effective spot to set up the smoke detector. You must place it so that it could efficiently find smoke flowing to the area. This implies preventing any dead-air spaces which don’t get much atmosphere circulation. Air areas typically appear in borders and corners where the ceiling meets the walls. They are able to include more dead-air areas since cathedral ceilings frequently have more angles and borders than level ceilings. Look for a place on the ceiling which is at least 6″ from any wall or corner border. Avoid setting the alarm near windows, doors, vents or air passages which could interrupt air circulation that is regular.

Put a ladder below the place in which you would like to set up the smoke alarm. Climb the ladder and measure and mark an area 3″ down from the best point in the ceiling. Hot air and could pool in the ceiling’s highest level, therefore putting your sensor only at that point raises your likelihood of smoke discovery and gasses often flow upwards.

By having an electric drill, fasten the mount of the alarm into position on the the location that you marked on the ceiling. So consider caution to drill the screws right to the top layer of the ceiling due to the ceiling, the mount will take a seat on on an angle. After the mount is risk-free, snap the alarm to the mount.

See related

Annual Care on Front-Loading Washing Machines

Modern front-loading washers work a lot better than traditional top-loaders. These devices can be called high efficiency devices, preserving electricity and water sources. Bureaus and authorities across the nation exceptionally support using washers in your family. As an example, the Green California bureau supports using and purchasing water-saving washers for enhancing total house efficacy as a best-practice. Washer proprietors should perform maintenance on the washer, outdoors and in, to make sure that it continues to operate as a high efficiency equipment, subsequent to the sale.

Care or Cleansing Cycle

Front loaders are exceptionally efficient because small water is used by these appliances. Sadly, mildew and mould can develop inside of front loaders due to this efficacy. The low water amount and door that is air-tight seal make an environment that’s ripe for deposits and disagreeable smells. HE -washer makers incorporate a maintenance cycle that fills the device to the brim with water that is hot, so you could efficiently clean the inside out, leaving no elements unaffected. This can be helped by using an HE- skin cleanser or chlorine bleach that was fundamental. The care or “Clear Washer” cycle seems as a choice close to the normal washing cycles on several frontloaders. Even though this cycle should be used by you monthly, it operates for yearly cleaning functions, too. Some high tech washer versions alarm you to the control panel when it’s the right time to do care, for example after 30 cycles that are total.

Door Seal

The do or seal on a front loader is essentially an inanimate, non moving component of your device, but it’s essential to its functioning. The drum rotates on a horizontal axis as it pulls your laundry through the detergent and water answer. Despite low water amounts in high efficiency washers, proprietors must pay awareness of the do-or seal that stops suds and water from leaking down the entrance of the device. Carefully scrutinize the con-Tact area on the framework of the washing machine in addition to the black do or seal on the entranceway through your annual care regimen. Generally, you need to use bleach to wipe and clear a way from occurring build-up and deposits which will prevent an air-tight seal. Nevertheless, some manufacturing companies prohibit the utilization of chlorine, even in type, advocating detergent and just a soft material.

Laundry Merchandise Dispensers

Front-load washer dispensers carry laundry-cleaning goods including high efficiency bleach, detergent and fabric-softener. It appears illogical to must clean a compartment that simply holds a cleansing answer. Nevertheless, both driven and fluid laundry goods block the re-lease of the detergent which is critical to appropriate clothing washing plus can construct up within the dispenser over time. Furthermore, mildew and mould can gradually increase in this section of the washing machine at the same time. Clear and remove the dispenser drawers annum, per maker directions, even in the event that you CAn’t visually find any deposit.

Outside and Connections

You most likely do a great job of keeping front and the best -facing elements of your washing machine, for example casually wiping a way dirt and fluid detergent that is splattered. Yet, think of your contemporary HE frontloader as an excellent furniture piece. In case your equipment is metal or brushed aluminium, discover about your maker’s recommendations for keeping including using protecting polish the surface. Clean out the cracks and crevices on the pushbutton controlpanel to stop buttons from becoming nonoperational and tacky. Unplug the electricity and carefully assess in the rear of of your washing machine for safe water offer and drain hoses, looking for little water pools on a floor. Replace elements that seem to be losing integrity from years of routine deterioration.

See related

The best way to Furnish a Sunroom

Your focus needs to be outdoor rather than inside though fundamental design rules apply if you are furnishing a sun room. The windows would be the focal point that is normal. Well-adorned indoor comforts are combined by sunrooms using the feel and look of outside living. The keys are optimizing see and the mild and maintaining the appearance normal and cozy.

Furniture

Contemplate the methods you will make use of the space before buying sunroom furniture. Would you need dining room, living area or a mixture? In case you prefer the thought of an old fashioned sleeping porch, you might want to allow room to get chaise or a day bed; equally are perfect for afternoon naps. Look at a table, in case your sun room will double as a conservatory. When you are able to make your furniture choices, choose straightforward, organic materials and finishes. All wood tones function, but pick satin, matte or distressed finishes rather of ones that are glossy. Combine in maybe a little fe, and a piece or 2. Do not purchase a dozen coordinated pieces of furniture that is twig, but do contain some outside-inspired stuff, such as bamboo, wicker or rattan. For furniture, choose linen or cotton over sensitive silks and damasks. Both designs and solids work nicely. Trellis and flowery designs are options that are classic. Stripes and checks, particularly strips that are ticking fit the simple feel. Material does fade in sunlight, so pick as they lighten materials and colours you will still enjoy.

Window Treatments

Avoid using draperies that are fussy in your sun room. Select the most straightforward, minimal alternatives instead. In many sunrooms, particularly those with west-facing windows, you will need to filter the sun when it gets or glares also popular. Woven protections generally operate nicely, plus they accentuate the normal sense. Other mild-filtering choices contain lace or sheer drapes. Keep the drape design straightforward and make certain they will open to expose all the pane. Join light filtering colors with lightweight drapes it is possible to shut in the event that you have a need for solitude during the nighttime. Use drapes as an alternative to protections when you yourself have windows. Windows, which are occasionally called Flo-Rida windows, are constructed with flat slats of glass. The appearance is overly insistent and active because protections can also be inclined.

Rugs

It is possible to choose to depart them bare, in case your sun room has lovely hardwood or tile flooring. Select casual carpets over proper orientals in case you would like your furniture to be anchored by something gentle under-foot and dampen echos. Natural fiber carpets jute highlight the outdoorsy sense or produced from sea grass. For routine or colour, kilims and braided rag rugs may also be sunroom alternatives that are great.

Lighting

If you intend to use the the room a T evening, or in the event the mild in your sun room is not continuous throughout the day, you will require some man-made lighting. For lamps, select ceramic, turned glass or wood foundations topped with cloth shades or straightforward paper. Lamps, animal or person seem enchanting should you not overdo it. Nature-inspired alternatives contain foundations generated from geodes or driftwood. For over-head light, think about an easy chandelier produced from wood, iron or capiz shells. Dazzling crystal chandeliers function nicely for light sunrooms, even though they are more proper as opposed to remaining furnishings. Lead Crystal seems blazing when it is hit by the sun.

Accessories

Plants are the perfect accessories for sun-rooms. Attempt a combination of hanging table-top crops, baskets and trees. Hang art work that complements the setting for those who have surfaces between your windows. Landscapes and botanicals are great options. Drop several cushy put in a toss for more chilly times and throw pillows in your upholstered seats. On your table-tops, show a number of favourite gems, for example a set of stone or crystals, handcrafted pottery, or a terracotta sculpture.

See related

The best way to Wash Rust From a Brick

Brick is an extremely appealing and long-lasting material frequently used to create terraces, paths and building facades, but the occasional cleansing is needed by strong bricks. You must wash them quickly in the event that you become aware of rusty spots in your bricks. Rust cause and can disperse your brick to begin deteriorating. You will get your bricks rustfree again by utilizing specific rust or common family items -removing substances offered by home improvement retailers. An excellent guideline would be to focus on the lightest cleaning procedure and work your way upward to substances that are harsher.

Take security precautions. Put on rubber gloves and protective eye equipment before handling substances or any cleaning products. Wear long pants and an old, long-sleeved shirt to secure legs and your arms. Cover any plants with drop cloths.

By rubbing the area loosen the rust. Sweep any particles from the brick using a cleaning brush.

Create a paste of lemon-juice and kosher salt. Put on the paste to the rust spots and abandon it to penetrate the brick for 2 to three hours. Carefully rub-off the paste using a dry rag.

Use a toilet bowl cleanser including hydrochloric acid to rust spots that are staying. Pour right onto the area, allow it to sit for approximately five minutes and wipe it off using a moist rag.

Use acid on persistent rust spots. Consistently follow the instructions on the label of the product’s, allowing the substances permeate the brick for the longest time that is suggested. Scrub using a scrub brush by spraying them with water from a hose and completely rinse the bricks off the rust.

In the event the spot remains, make use of a business rust-removal powder. Use the item in accordance with manufacturer’s directions and let it sit down for about half an hour. Scrub the regions that are impacted and rinse the brick out of your garden hose.

See related

The best way to Install Pre-Hung Swinging Doors

Swinging doors open in both directions using a drive rather than with the flip of a knob. Newer layout swinging doors providing alternatives for keeping the doorway open or letting it pivot both open and slide across a trail. The definition of prehung relates to to doors mounted before installing in a framework. Of swinging door you’ve got, whatever the sort, prehung versions install the same as any pre-hung door.

Place to the door-opening, flush with all the drywall. Make use of the amount to make sure the door sits square in the opening. Use shims to make a a good match between the opening as well as the pre-hung door where there are openings involving the opening as well as the door. Examine the doorway in the corners using a carpenter’s square to be certain they’re after including the shims square.

Drill two 3-inch drywall screws to the jamb and right through to to the trimmer studs at 2″ under the the top and middle hinges.

Nail 12d complete nails and to the doorpost. The nails should be long enough to have the the jamb and into the 2by4 framing across the door-opening.

Fill in the opening body with growth foam as well as the gaps between the doorframe. This can insulate the opening and remove airflow across the door that is brand new. Leave the foam and grow according to producer’s directions. Trim away any excess using a utility knife after it dries.

Cut trimming to the measures of the doorway. Cut the width bits shorter in relation to the total measurement to enable the measurements of the height bits. As an example, in the event the trimming near the doorway is 2 inches broad, subtract 4″ in the breadth of the door frame that is total before reducing the trim for the very top of the framework. Install the glue, within the the door-frame as well as the opening between the wall framing.

Nail the trimming set up forever with 4d complete nails. With fitting putty to hide them, fill.

See related

The best way to Hang Drapes Over a Radiator

In the event that your home is within an older house, you may have traditional radiators beneath your windows. Radiators allow it to be catchy to dress your windows though perfect for drafts. Flooring-length drapes complement windows, but the warmth is blocked by shutting them. Dressing the window with blinds or shades is one alternative, but the look does not fit everybody. In case you would rather the appearance that is curtained, two drape layers are being used by the important: ground-size, below drapes you shut and open set shorter and drapes to frame the window.

Assess the absolute width of the window, for example, window molding. Quantify double or several windows joined by middle strips of moulding as one window.

Assess the width of the window molding. The molding include and width 4″. Subtract the total in the total window width from Stage 1.

Multiply the result from 2 by .50. Add the effect to the result from Stage 1 for the curtain rod width that is required, minus any finials.

Center post or a traverse – type curtain rod on preferably midway between the border of the window molding the window as well as the ceiling. Indicate the mount places in accordance with the recommendation of the manufacturer’s. Install the mounts in line with the directions, which change by design pole kind as well as producer. Set they aren’t secured by the sticks on the mounts, however if if you are using a post-design stick.

Quantify to the sill or to the underside border of the window apron — the one closest to the pane — in the interior pole. Quantify in the hook pin-holes for rods, or in the top border of the stick for post sticks. When selecting between apron or the sill, measure to whichever is closest to the radiator while staying at least two inches above its best. The apron is the level plank beneath the sill. Subtract one quarter inch out of your result in the event that you quantified to the sill.

Hang one drape panel measuring the span on each end of the internal pole by the complete pole width from Stage 3 from Stage 5. Choose a drape design it is possible to open and shut easily. For rods, pick drapes having a smocked or pleated header. For post sticks, attempt rear-tab drapes or flatpanel drapes with concealed bands

Measure to a floor — in the outer pole — from the very best of the pole or from the pin-hole, depending in your pole kind. Subtract one quarter inch in the end result.

Split the complete pole width by 2 for double and solitary windows from Stage 3. Split the complete pole width by three for bigger or triple windows.

Hang one drape panel measuring the span a-T each end-of the outer pole by the breadth from Measure 8 from Action 7. Order each drape panel therefore it crosses to to 2 inches from its various border of the stick onto the pane. Because these panels stay in a rigid location, somewhat than shutting and opening, it is possible to use any floor -span design which works by means of your stick sort.

Safe post sticks to the mounts, as stated by the directions of the manufacturer’s.

See related

The best way to Set Up Quarry Tile

If you want flooring that looks great doing so and stands as much as a small insult, it is difficult to make a mistake with quarry tile. Tile consists of clay, generally in 1 2-inch squares, and is heavier and thicker than ceramic tile. Frequently called Spanish or Mexican tile, it’s common in California where its vibrant tones and pastoral style complement Spanish- and Mexican-inspired buildings as well as other areas that are informal. Quarry tile in kitchens, entry ways or outside spaces, everywhere a rough, long-lasting surface is required. Its area is porous and susceptible to stains and wet, so make sure you seal it after install while quarry tile is permanent.

Examine the flooring where quarry tile will soon be set up using a 4-foot level and appropriate any areas that are irregular, with self-leveling cement on a floor or by including cement backer board on a wood sub-floor. Install backer board to the wood sub-floor with corrosion-resistant nails or screws; foillow guidance of fasten and the producer having a screw or hammer gun.

Measure corner to corner with a tape measure and indicate the middle of the ground where these diagonals cross. Snap chalk lines across that facility as reference points, both breadth and the length of the flooring region. Make use of a carpenter’s square to ensure the intersections are square.

Lay tiles over the guidelines to discover a routine, utilizing as several total tiles as you possibly can out. Fix tiles in the lines, if required, to prevent any tiles that are slim in the borders. Indicate a different snap line, keeping the lines and square on any revisions.

Dampen the concrete or cement backer board with water; use a wallpaper brush to distribute water however do not create pools, covering one place at a time. Blend mortar in a container that is big; follow instructions on the mortar bundle. Make use of a mortar advocated by the tile provider. Combine it thin enough to spread readily but to standalone.

Distribute mortar over a place using the notched aspect of the trowel of a level mason, functioning toward a corner and beginning in the middle. Cover a region around nine tiles a T a time. Place set up in the middle junction and perform toward the partitions, shoving against the tiles to the mortar. Wiggle each tile somewhat to place if securely.

Place tile spacers a-T corners between tiles to develop a line that is grout; these can be any dimension, but quarry tiles use inch areas. Place throughout the tiles following the very first nine are set and make use of a rubber mallet to faucet down or fix low or high areas. Work to partitions and cut tiles to to suit a-T borders having a masonry tool or by snapping it against a straight-edge and scoring a tile. Make use of a tool for alternative cuts or notches.

Cover the flooring, employed in in nine-tile squares and toward an ex IT doorway so that you don’t possess to discuss on tile that is new. Continue within sections, equally to le Vel tiles and across the whole flooring. Set an extended 2 by 4-inch plank on the other side of the region and establish it with a degree to assess the entire floor.

Let mortar place for 2-4 hrs and take away the tile spacers. Grout the areas between tiles having a rubber grout float. Begin at one corner and distribute grout in a figure8 form with all the float a-T about a-60- each of the openings to fill entirely. After all joints are filled, wipe extra grout off the tile area having a moist sponge. Let the grout to dry and wipe-off any dehydrated surplus using a soft material.

Apply sealer using related applicator or a paint-roller — see the directions of manufacturer’s — making certain to cover the complete surface; it might take greater than one application to fully seal the tile. Allow the sealer dry between layers. Examine it by dripping water in a inconspicuous place; the tile is sealed if it puddles on the surface if added layers are expected.

See related