Category: Home

Houzz Tour: Modern Bucktown Beauty

The group in Kara Mann Design were initially challenged with the sheer size of this 6,600-square foot modern home in the heart of Bucktown, one of Chicago’s metropolitan areas. The designers began with the color palette, by introducing warm tones and colors of brown into the space, and abided by the desire of homeowners Al and Anna Goldstein’s want to maintain the surroundings neutral. Anna says, “We wanted to keep it simple, in order to not restrict us in selection of furniture and décor.” The house was constructed and designed keeping in mind the couple’s need to entertain guests and also have room for a family one day.

The initial vision of the fantasy home was that of owner Al, with inspiration from his wife Anna. “My husband already began dreaming up the house before we met, therefore the fundamental out lay was his thought,” Anna says. “After I came into the picture, I became really involved with the specifics of the house and fell in love with it also.”

Houzz in a Glance
Who lives here: Al and Anna Goldstein along with their dog Jackie
Location: Bucktown neighborhood of Chicago, Illinois
Size: 6,600 sq. ft., 4 bedrooms, 6 baths
Architect: Environs Development; Interior Designer: Kara Mann Design

Cynthia Lynn Photography

The stem of the house is painted in a chocolate charcoal brown to serve as an anchor and pull the home’s warm tones together. The seating area from the living room provides a visually open texture. It enables those seated to have an unobstructed view of the dining room and a glance into the family room/kitchen area.

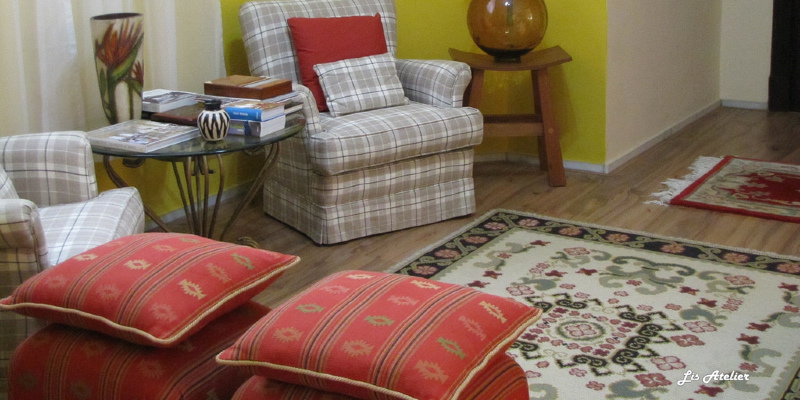
Anna discovered the glowing painting onto a trip to New York. The warm hues from the painting pull together the traces of color from the room. The acid-green pillows also function as a pop of color against the monochromatic chairs.

Cynthia Lynn Photography

Floor-to-double-ceiling windows from the living room look onto the bustling Bucktown neighborhood through gauzy roman colors. The oversize chairs were designed by Kara Mann and upholstered in a polyester/viscose tonal stripe cloth by Pollack Fabrics.

Cynthia Lynn Photography

The dining chairs are timeless in arrangement, but made edgy with a patterned print onto its back. The sea urchin-like chandelier and oversize Casamidy mirror complement the couple’s modern design.

Dining seats: Artistic Frame
Chandelier: Lumière by Jean de Merry

Cynthia Lynn Photography

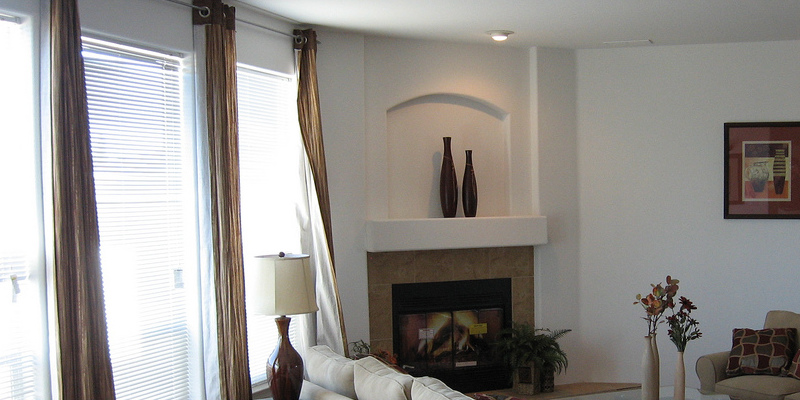
Mann wanted the living room to function as a couch, and she realized that by designing around the fireplace. Anna says this is their favorite spot in the house.

Coffee table: Jayson Home & Garden

Cynthia Lynn Photography

A bookshelf functions as a divider between family room and kitchen. The designer maintained the shelving low to prevent obstructing the view of anyone seated on the sofa. Their dog Jackie can see into the kitchen and know when dinner is prepared!

The bookshelf also functions as a display area for the couple’s image frames and keepsakes, such as a figurine given to the couple after their engagement.

Cynthia Lynn Photography

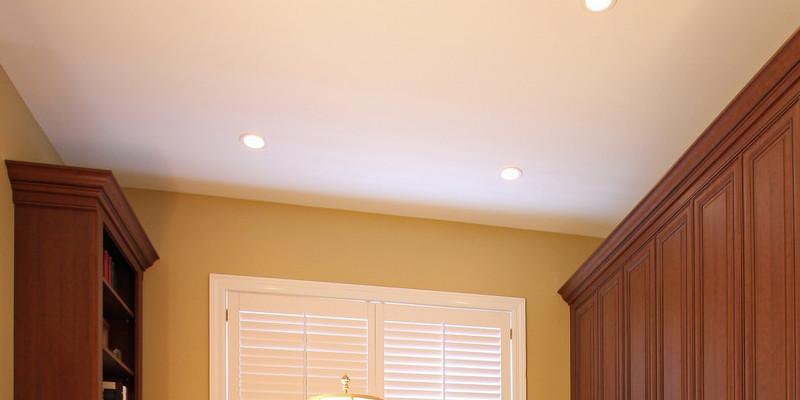
The home office overlooks the double-height ceilings, which make a great open space. An abundance of lighting makes the oversize club seats a great place cozy up with a novel. The Dennis & Leen woven seat and Tai Ping rug add classic design elements to the modern design room.

Cynthia Lynn Photography

Hardwood floors flow through the residence. The selection of flooring had been their main design issue, Anna states. “I wanted lighter and my husband needed a dark wood floor. He won, and as much as I hate to acknowledge it, I look at the final solution, he was perfect.”

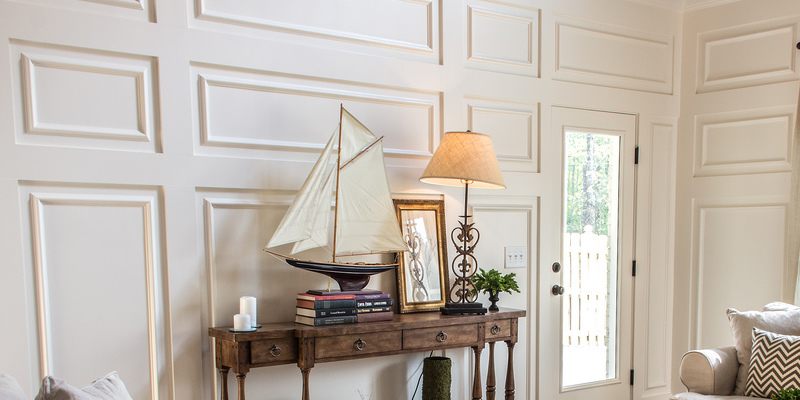
An adjoining stairs leads into the kitchen, family room and foyer. Waiting from the front door is a part the couple picked up in a neighborhood design store. The piece reflects the Chinese Chongqing Dog, a powerful and muscular natural guard dog. The figure functions as protector of the house, but don’t tell their dog Jackie!

Cynthia Lynn Photography

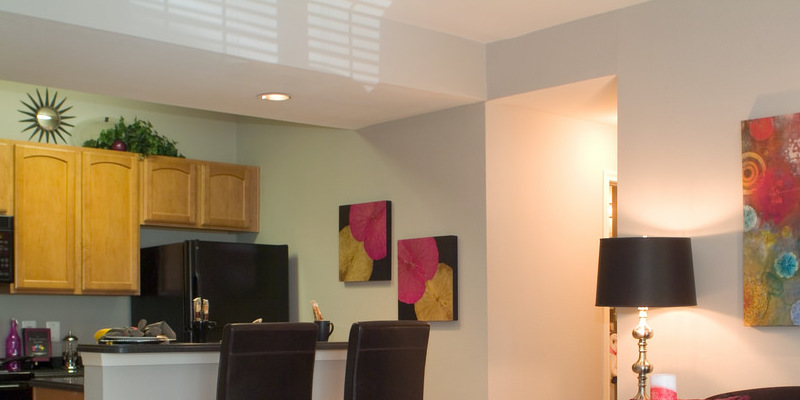
The elongated kitchen is embellished with shimmering glass tiles that guide all the way up. The tiles add a bit of contrast to the ordered cabinets that line the wall. Tiles were sourced in Urban Archaeology’s Glass Sticks with a custom color by Kara Mann.

Barstools were set along the counter for a casual dining experience along with extra guest seating. Large lace pendant lighting by Moooi hang above.

Cynthia Lynn Photography

The master bedroom on the second floor has a much lighter color palette than the remainder of the house. A plush rug under the king bed is nearly as comfortable as the bed. It’s a wonderful spot for their dog Jackie to sleep — which is, when she’s not on the sofa.

Cynthia Lynn Photography

The home office, that overlooks the living room, has an open source approach to its layout. A tri-level publication shelf which divides the hallway from the workplace.

Cynthia Lynn Photography

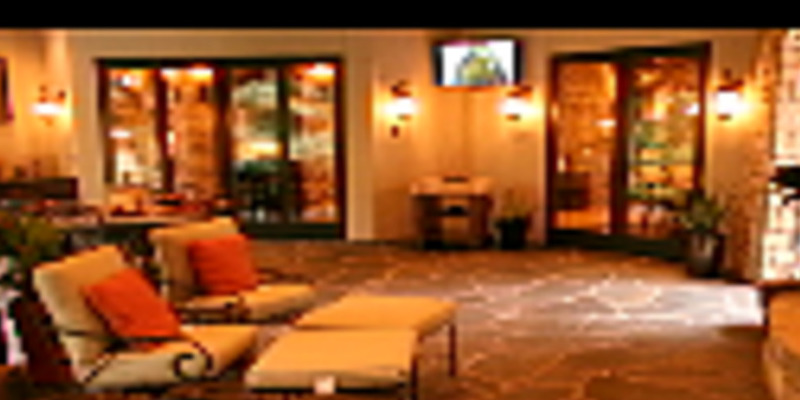
The basement press room is meant to be in which the all-male actions take place. The designer wanted to keep with a lodge-like texture, bringing in darker tones and rustic leather seats. The table converts into a pool table, along with the poker dining table next to the wet bar keeps the actions to a central room.

The basement also holds a home theater, wine cellar, gym/sauna and other sleeping quarters.

Cynthia Lynn Photography

The house sits on the corner of two tons; its modern design fitting right in with the urban landscape.

More Inspiring Houzz tours:
Warm and Modern in Austin
A Soothing Retreat in the Heart of Chicago
Living Luxuriously with Nature

See related

Storage With Style

The search for storage is a plague every homeowner and tenant suffers. However many cabinets, cabinets, nooks and crannies we now have, it appears there is never enough. Or, half of it’s an eyesore. What are people to do? While clicking through the Houzz library of storage thoughts, I understood the answer may just take a little creativity.

Feeling enjoy clutter is getting over your home? Have a minute to browse through these photos for smart solutions which will free up space without forfeiting your home’s style.

Bosworth Hoedemaker

Out of cabinetry although not outside of dishes? Don’t let a wall of windows block you from utilizing storage. Show your dishware by installing shelving across the windows; the organic light on the pieces will create a showcase.

Amy Lau Design

Install recessed shelving to your walls and finish it with cabinet doors which twice as artwork when shut. This individual has used it as a pub, but you can readily hide anything from novels to stereo equipment within this creative market.

Elad Gonen

Or, look at adding recessed shelves. You’ll have space for all your kitchen specifications and also score a clean-lined, modern appearance.

Mark Newman Design

The key to great storage is economically using every inch of your home. Install outlets inside cabinets so you can slip your printers and other technician to odd spots.

MN Builders

Believe out-of-reach spots are off limits? Not when you’re able to install a stylish ladder on a track to achieve them.

Bunker Workshop

Or use the region over your kitchen cabinetry. The area within this kitchen is set to clever use for an eye-catching spice collection.

Kerrie L. Kelly

Hanging objects from the ceiling is a great alternative when wall space is tight. Don’t have space for a towel rack? Get clever by using a classic scale.

Camber Construction

Never overlook the precious space beneath the stairs. Install built-in drawers for greater organization. Create them in different sizes so you’ve got a place for everything.

John Lum Architecture, Inc.. AIA

Or, build drawers right into the stairs! Now you don’t have any excuse for cluttering the stairs with whatever you wish to carry up “at some stage.” (We all know how that goes.)

Marie Newton, Closets Redefined

Custom shelving can be built for even the quirkiest of spots. This narrow area, which would likely have been left empty, became a practical place for shoe storage.

Lindy Donnelly

If your washing machine and dryer are in a funky place, consider hiding it behind moveable bookshelves. When they are closed, you’ve got a library. When they are open, a laundromat.

Glenvale Kitchens

It appears strange to me which corner drawers aren’t more popular, because they make so much sense. Not only are they a unique design, but they also keep your kitchen things from getting lost in the dark, black hole in every other sort of corner cabinet.

Artisan Kitchens Inc..

Even the pets want their bowls stored appropriately. Consider adding distance at the end of your own island to keep food and water bowls out from underfoot.

More:
Storage Launched by Expedit Bookshelves
39 Ways to Organize Your Stuff
24 Hot Ideas for Stashing Spices

See related

The best way to Install a Cat Door in a Hollow-Core Door

Cat doors may be installed on exterior doorways to enable a cat as it pleases to really go in and from the home. For those who have a big dog which you wish to keep from the cat’s food, a cat do or can offer accessibility to your cat from entering the area, while avoiding animals. Hollow core doors are frequently employed in houses as bathroom and bedroom doors. Adding a cat door into a hollow core door needs function and a little more planning than other kinds side, as a wood support frame will require to be installed on the the inside of the door.

Remove the hollow-core door.

Measure the peak in the floor to its stomach using a measuring tape, of your cat’s belly. This can be how high-up the cat door wants to be from the underside of the hollow-core door.

Transfer the measurement from Step Two to the door using a pencil.

Measure the door to get the middle stage. Create a mark one foot up in the floor in the middle point on the exterior and the inside sides of the door.

Cut out the cat door template or make one by cutting it out and transferring its dimensions into a big bit of paper.

Center the cat do or template using the bottom of the template arranged with the 12-inch middle level, on the do or mark you drew. Trace throughout the template having a pencil. Make the marks as you do s O, and le Vel as achievable.

Trace across the cat do or template on another side of the do or.

Mark the area for the screw-holes, in the event the door includes a lock of the lock, 7/16 inch a-way from the correct . that is bottom Draw still another mark 2 1/4 inch up from the bottom corner (or according to your pet do or guidelines, if it h AS diverse dimensions detailed).

Drill a-1-inch hole on every corner on the do or routine to generate accessibility factors that are jigsaw.

Insert the jig-saw into the hole and gradually cut along the line of the do-or routine. Cut out the do-or routine on another side of the do-or in much the same.

Measure the the inner dimensions of the cat do-or hole; this contains height, the width and duration of every side of the opening that is hollow. These dimensions will be utilized to produce a wood assistance body that matches inside of the cat door-opening on the hollow-core do-or.

Cut four parts of wood in the 1-by-2inch wood plank. Cut onepiece per each aspect of the opening in line with the the scale from Action 1 1.

Apply wood glue and insert them together with the leading area of the wood parts arranged with the cut fringe of of the cat door-opening, to the hollow do or.

Attach Cclamps onto the opening of the do-or, with each clamp keeping an area of of the do or on a wood piece. Wait 1 2 hrs for the wood glue to dry before eliminating the c clamps.

Insert the the inside aspect of the cat do-or to the opening on the do-or. By driving the middle screw of every side to the door loosely connect the the inner aspect of the cat doorframe to the wood do or.

Insert the the outside body (if perhaps not previously installed on the cat do-or) to the hole in the do-or. Before the flanges of every side of the cat doorframe fulfill inside the hollow do-or push the the surface body to the door.

Attach the the outside body of the cat do or with screws.

Attach the cat doorlock, if any, with screws to the do-or.

Hand tighten it to be secured by every one of the screws on the cat do-or to the hollow-core do-or.

See related

The best way to Protect Appliances

Lightning can ruin electronic appliances that are delicate even if your home was n’t immediately hit by it. Strikes at powerlines can deliver a surge of electricity and in to your appliances. Household appliances operating on 120-volt alternating voltage can be handled by current surges up to 169 volts, but surges beyond that that time cause harm. Lightning-induced surges can spike to several hundred volts. It’s possible for you to help by using surge protectors safeguard your products. In extreme storms, disconnect cable and telephone lines and the greatest defense would be to unplug your appliances.

A plugin, level-of-use surge protector that is electrical. You plug your equipment to the surge protector and plug this device. In order that they do not achieve your equipment, the protector diverts energy surges to the floor link. Some multi-outlet power strips have an integrated surge protector. Most surge protectors have a light that signifies they’re operating. Change the protector in the event the light is out.

Use plug- for phone and Cable Television lines. Lightning- induced surges can travel cable and telephone lines up to harm appliances and the products attached to to them. The cable and telephone protectors function in the same style as electric-line surge protectors by delivering surges to a power floor. They routinely have have a steel grounding prong, as well as prongs that hold the system in a electrical outlet. You plug the protector to the electrical outlet; plug the telephone or cable line to the “line” aspect of the protector; and link the other aspect to your own phone, tv or alternative device. Some surge protectors provide safety for cable and telephone lines.

Install a-service-entrance surge protector to safeguard your whole home from surges. Like plugin protectors, the unit divert excessive voltage. A certified electrician must installs service entrance protectors. They usually go involving the main service panel as well as the meter. They guard the residence electrical system, including appliances and gadgets which can be hard-wired to the strength resource somewhat than plugged in. They can come together with point-of-use protectors to double the le Vel of surge safety.

See related

The best way to Keep Metal Exterior Doors From Mildewing

Unlike other natural components, metal and wood itself does not offer meals for mould and mildew, but dirt, contaminants in condensation and rainwater, and the oils from fingers depart enough natural material to enable mildew to develop on metal doors. As the substance of the door doesn’t help mildew development, the issue should be eliminated by cleansing it often. Soap residue can be lived in by mildew, therefore rinse the door carefully after every cleaning.

Put on rubber gloves to protect your fingers. Mix 1 cup in to 5 gallons of water that is luke warm.

Soak a sponge or a soft- brush in the the answer, or fill a low pressure spray washer with it. Wash the do-or from bottom to top. Cover the whole area of the do-or completely and evenly.

Rinse the door carefully with clear water, both manually or using the spray washer. Remove all traces of the the answer in the steel.

In the event the ammonia answer doesn’t fix the mould issue dilute 1 cup of bleach in 5 gallons of water. Add 1 cup of gentle soap. Wash and rinse the door as before.

See related

The best way to Take Down Plaster Walls

Plaster walls are typical in houses that are over the age of mid-20th century, and gypsum-based or drywall supplies became more conventional. Drywall is not tougher than sound plaster but have the potential to degrade and fail of being irreparable, to the idea. An unhealthy plaster blend can change sandy and soft over time, and settling of the home can trigger plaster and key cracks. Removing plaster that is aged is a demolition work that is straightforward; tools or no specific methods are needed. Afterward, you have plaster partitions fabricated over the freshly exposed wall studs or can hang dry wall.

Shut off the energy in the area where you will end up working. Employ an electrician to shut the power off while you perform in the event that you are not comfortable working with electricity and change it it on when you’re finished back.

Remove the gang box faceplates, including outlet and switch covers, by turning the screws counter-clockwise using a flathead screw-driver. In the event that the plates will be reused by you, spot them-and the screws in a plastic bag or box for safe-keeping.

Pry off the area trim molding, using the end of a prybar, including baseboards, door and window trim, crown molding and chair rails. In the event that the molding will be reused by you, number the items as they can be removed and set them apart in a secure location.

Place drop cloths on the ground through the room and set large-gauge contractor-type trash bags within easy reach.

Put on eye protection, heavy work gloves, large- a dust mask or respirator as well as work boots -design mask. Whether there are windows in the space, open them. An excellent offer of fine- some-times there are mold spores in the partitions, and particle dust is kicked-up while demolishing plaster.

Tap the plaster on a-wall having A3 or a hammer -pound sledge hammer before the plaster cracks and crumbles. A little sledge-hammer makes the job easier, but some caution is required by it. In the event that you use a sledge, faucet the wall lightly; don’t bash it having a lot of force. Wood lath underneath the plaster certainly will cause the hammer or sledge to bounceback and strike you, s O stand to along side it of what your location is breaking up the plaster and is usually springy.

As you function pull damaged plaster off and spot it in the trash bags. Continue till all plaster is damaged off the wood lath strips underneath.

Collect plaster that is free from your floor and spot it to the contractor trash bags. Plaster is really heavy, hence the bags become or may split overweight in the event you fill them mo Re than half-way to carry.

Pry the wood lath strips off the claw end-of a hammer or the wall studs using a prybar. As there’ll be several lath strips through the room this can be an incredibly tedious procedure. Use treatment to not disturb the wiring in the partitions.

Pull as a lot out. In several cases, the nails will be broken off by the heads. If it happens, possibly grip the shanks of the nails and pull out them, or hammer straight back them to the studs.

Sweep up the debris from your drop cloths and spot it in to contractor bags.

Fold up the dropcloths, off and vacuum the particles from the partitions the flooring, then make still another move on the walls to test for nails that are over-looked.

See related

When Installing Pebble Glass Tile Backsplash the best way to Reduce Seams

Glass pebble tiles come attached to a mesh backing that is flexible. Sheets are developed with irregular borders that comfortable up to another sheet in a method that was comparable to jig-saw puzzles. This creates the the most well-liked, lay-out that is random. However, many tile sheets have straight edges, which introduce begins and obvious stops all through the tiled area. To get a more specialist, seamless look, you’ll require to to improve straight borders on pebble tile sheets before installing them. Having a little prep work, they’re going to look as though each tile was one that is established at a time.

Lay the glass tile sheets alongside in the arrangement you will use on the wall, on a work area or counter-top.

Cut each tile along the edges of the tile sheets where the sheets will butt off. Don’t alter the edges which will butt against a counter-top, the conclusion of a a large part, a wall or some other straightedge. Cutting personal tiles off in the edges of the tile sheets creates the wanted irregular border. You lay the tile sheets and slice the the mesh using a utility knife, or can cut with utility shears.

Set the tiles that you eliminated a side, but don’t discard them; you’ll probably require them to complete gaps and finesse the last lay-out.

Push the edges of the sheets of tile again together in the layout that is initial.

Cut off personal tiles here and there along the edges of the tile sheets as required, enabling the seams between sheets to interlock as carefully as feasible. There is going to be some places that don’t interlock completely, no matter how carefully you trim and change the borders.

Add personal tiles straight back to the lay-out, filling out gaps and spaces between the seams in places where the routine won’t interlock. This section of the method is test-and-error, and ought to result in an appear that’s aesthetically pleasing for you.

Install person tiles in the sam e lay-out and the total tile sheets that you produced on counter-top or the function dining table.

See related

The best way to Identify a Potbelly Stove

Stoves can include a feeling of traditional charm to your own living space. Popular in the late-1800s , these stoves on average were utilized for warmth . for cooking and They usually had ornate styles and were shorter and smaller than several wood-burning stoves. They resemble other kinds of stoves that are antique, including the cylinder stove, but the barrel-shaped burn pot helps you differentiate a potbelly stove that is true.

Potbelly

The primary defining attribute of a pot-belly stove is the middle area. Unlike cylinder stoves, which are spherical but go up straight, the pot-belly stove features a bulbous middle that rounds out from top part and a more narrow bottom. There is also a rim round the midst of the heart, barrel- area. This rim is known as a skirt rail. Some skirt rails seem like trim that is little, while the others therefore are so extensive cooking utensils may be set to them and have designs.

Material

The stoves are manufactured from cast iron even though some contemporary variations of a pot-belly stove are manufactured from steel. There are generally two-doors on the entrance made of cast-iron. The very best door is for loading coal or wood, big, as well as the door is utilized to eliminate ashes and smaller. In order to watch the fireplace burning in contemporary stoves, the best door is an average of glass.

Flat Best

Because pot-belly stoves were used for heating along with cooking, the very top of the stove needs to be flat to produce a warm cooking surface. Some pot-belly stoves have domes on best which can be lifted to expose cooktops that are flat. The kitchen that is flat is generally broad, flaring out nearly as big as the middle of the burn up pot that is pot-belly.

Exhaust Pipe

True pot-belly stoves have prolong upward in the cook plate and exhaust pipes, which which are generally huge and black. Some exhaust pipes are put on along side it of the pot. They has to be ventilated to ensure security, although some pot-belly stoves might be changed into burn up fuel as an alternative to wood.

See related

The best way to Install Trim Moulding on Curved Corners

Because the mid-1970’s, drywall finishers have been making curved, or radius outside corners. Radius corners soften the appearance of a space compared to the conventional result created by 90-degree angles on exterior corners and around windows. Installing moldings isn’t hard, but you’ll need to take out your math abilities a little. Fortunately, all the cut angles will be the same, 22.5 levels. No match will be best because of imperfections in the wall close to the corner radius, or due to imperfections in the texture on the wall. Patience is required for because of this trialanderror approach.

Preparation

Measure and mark the backside of a bit every two inches, of trim. Make one mark for every corner piece you want to create.

Cut the parts using a chop saw. Set the blade angle at 22.5-levels or 67.5-levels depending on the kind of scale your observed uses. Keep the trim piece you’re cutting square to the saw’s rail and square to the saw’s foundation when you reduce.

Piece is cut by the back side of each around one-inch from the first-cut. Measure some parts somewhat smaller than one-inch and some parts somewhat bigger. Don’t exceed 1/8 inch bigger or smaller.

Rotate each piece that is little, before cutting -degrees in the direction utilized throughout the first-cut. Cut each trim piece that was little together with the chop saw over the line. The first-cut will be mirrored by this cut.

Installation

Install the horizontal trim on every side of the corner. Cut these parts with a 22.5-diploma angle. The front side will not be lengthier than the backside of the trim. So the backside edges of the items stop in the idea where the radius starts on each aspect of the corner install the items.

Apply heavyduty development glue to the trunk of the double- cut corner piece that press it in to location, and you want to install. The glue ought to be thick enough to contain the the corner piece that is trim set up.

Wipe a-way any excessive glue from your seams involving the corner piece and also the horizontal items, and any excess glue on the very best of the corner piece.

Subsequent to the glue h-AS dried caulk any gaps involving the corner as well as the corner piece.

See related

The best way to Replace an Over the Array Constructed in Microwave Oven

Smaller families require to create usage of available area, particularly in the kitchen. One answer that is typical is an over-the-range, built in microwave oven. As time passes, it might be required to to displace the microwave you want to update the kitchen before placing your house out there or in the event the equipment breaks. You might be in a position to use the first mounting plate for the microwave for the microwave that is new since both appliances should be the same dimensions for over-the-range use.

Removing the Aged Microwave

Turn the circuit-breaker in the main panel that powers the microwave oven off.

Unplug the microwave in the wall outlet. The cord is generally snaked upward to an outlet concealed in a cupboard above in the appliance.

Use a non- contact circuit tester to confirm that energy is effortlessly off in the outlet of the microwave by putting the tester to the correct slot of the receptacle. In the event the power is off, the tester shouldn’t illuminate.

Remove the turntable, or some other components that are free, in the interior of the aged microwave so that they don’t become broken during elimination.

Detach the screw or screws securing the very top of the microwave to the the inside of the over cabinetry using a screwdriver. Each producer has a various amount of securing screws. The microwave’s guide to confirm all screw areas. Ask a buddy to help support the microwave while you remove the screws to avoid it.

Detach the screws keeping the microwave to the plate using a screwdriver. These screws are observed underneath the microwave close to the wall.

Pull the microwave oven in the wall and reserve. Inquire a buddy to assist with all the removal when it is an especially huge and hefty equipment. While pulling the microwave from your wall use sluggish actions; the cord can become trapped in the accessibility hole that is cabinetry.

Installing the New Microwave

Visually identify and verify the charcoal filters within the hood louver. They need to be obvious through the slats of the louver. Pre- charcoal filters that are installed permit the microwave to be installed as a layout that is ductless.

Lift the microwave near the opening. Ask a buddy to support the the microwave at this time. Snake up the cord to the accessibility stage to the outlet for potential connection.

Slowly drive the microwave up to the opening. Make certain it resides above the plate matches snugly contrary to the back-wall and tabs. While pushing it against-the-wall, use caution; if caught involving the appliance as well as the wall, the cord can become pinched.

Reverse actions 4 and 5 in the removing part to secure the microwave to the mounting plate and cabinetry.

Plug the cord to the wall outlet. Turn on the circuit-breaker in the panel. Turn on the microwave and test features.

See related