When Does the Annual Sweet Pea Bloom?

The sweet pea (Lathyrus odoratus) fills the garden with fragrance and delicate blossoms. This annual climbing vine is a highly scented ornamental closely associated with the common garden pea. Though the flowers are sweet smelling, sweet peas aren’t an edible crop. Sweet peas flower in the summer in cool climates and at the spring and fall in light Mediterranean climates.

Gentle Climate Planting

Sweet peas like to bloom if the weather is cool. In a Mediterranean climate with light — frequently frost-free — winters and warm summers, the best time to plant is in late summer and early autumn. A late season planting contributes to flowers in winter and early spring. For holiday flowers, get your seeds in the ground by Labor Day. You can also plant quite early in the spring to get an early summer bloom time.

Cold Climate Planting

In regions with cold winters where temperatures often fall below freezing, sweet peas are planted in the spring after the last frost date. By early to mid summer, the fragrant flowers are in full bloom in the garden. Sweet peas are best planted right into the garden bed, however, in regions with a long, cold spring, it is possible to start seeds indoors four to six weeks before the last frost date in your area. By the time that the ground thaws, you will have plants already growing to really go in the ground.

Planting Seeds

The seeds should be planted 1 inch deep in moist soil and spaced 2 to 3 inches apart. Sweet peas germinate best in a ground temperature between 55 and 68 degrees Fahrenheit. You can accelerate germination by soaking the seeds in warm water for 24 hours before planting or by gently nicking the seed coat with a pin or knife. Germination commonly takes 10 to 14 days but can be as fast as two to three days once the seeds have been jammed or nicked prior to planting.

Growing Sweet Peas

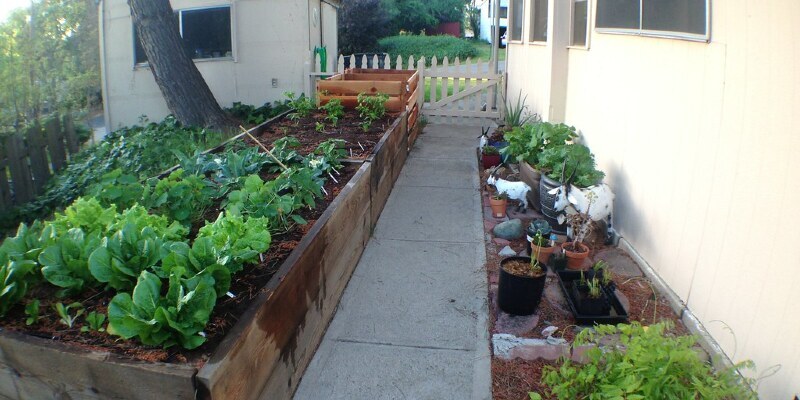
When planting sweet peas, a spot in the sun where the soil is shaded by other low-growing plants is ideal. It is one reason sweet peas are so happy in the vegetable garden; they can develop with their roots shaded from the other plants and many vegetable gardens are at a spot that gets lots of sunlight. This climbing annual vine will climb a trellis or climb up corn stalks and end around sunflowers.

See related

When to utilize Dolomite to Plant Tomatoes

A freshly picked, vine-ripened tomato is hard to rival in the home garden. Rumors grow well and produce wholesome fruit in bigger amounts when grown in slightly acidic soil that’s full of organic matter and contains adequate amounts of calcium and magnesium. Employing dolomite, also called dolomitic lime, can help to adjust soil pH to the desirable range for growing tomatoes. Dolomite also provides and facilitates the availability of soil nutrients to plant roots.

Dolomitic Lime

Dolomite consists mainly of calcium and magnesium, two small nutrients necessary for healthy tomatoes. It is generally obtained from pulverizing limestone. It is useful in the home garden as a soil pH adjuster when applied correctly. Tomato plants absorb the most nutrients in the soil when its pH falls within the desirable range. Dolomite also raises magnesium levels in the soil. In regions with a known magnesium deficiency, this is crucial for growing healthy tomatoes.

Soil Testing

Prior to putting a tomato garden, analyze your soil using a commercial kit or a service in the community area. Acidic soils benefit from prying of dolomite as early as possible before planting. Your soil test results will probably recommend lime amendments at a particular rate to increase soil alkalinity, if necessary. Tomatoes prefer a soil pH of 6.5 to 6.8 for best growth and fruit production. Treating untested dirt with dolomite is dangerous, especially if you garden in an area where soils are proven to be somewhat alkaline.

Soil Partner

Clay and silt soils are generally acidic. They’re also considered “tight” because they are often poor in organic content, leading to compaction and poor origin oxygenation. Conversely, sandy soils may dry too fast. Using dolomite alone may be inadequate to prepare those soils for growing tomatoes. Amending the soil by working in a 3- to 4-inch layer of organic matter like compost or manure to a thickness of 12 inches, together with dolomite, facilitates vigorous tomato root processes, healthier plants and raised fruit production.

Blossom-End Rot

Blossom-end rot is a frequent issue that frustrates many tomato growers. It typically occurs when the dirt is calcium deficient or doesn’t encourage calcium transfer. This occurs most often in soils that are too acidic, especially those with a pH lower than 6. In some instances, calcium presence could be adequate but tomato roots cannot absorb it in case the environment is too acidic. In this case, dolomitic lime is often recommended as the best corrective measure.

See related

The way to Kill Fungus on Plants

Plant fungus is easily controlled by using preventive measures. If your crops or vegetable crops have become contaminated with fungi, however, you can kill it with a fungicide. Common types of fungus seen on plants consist of powdery mildew, leaf spot, blight, root rot and white mold. Though some fungal disorders do little harm to crops, others who are left untreated can cause the death of the plant. For the best chances of succeeding, treat your plants at the initial signs infection.

Put on a set of goggles, gloves, and a mask prior to using the fungicide. This will protect you from breathing in chemicals or getting them in your eyes.

Prepare a fungicide containing the main ingredient neem oil or jojoba oil, according to the product label. These oils are organic and effective at both preventing and killing fungi. They’re also safe to use on many vegetables and ornamentals.

Spray the contaminated plant thoroughly using the fungicide. You won’t achieve success unless you cover the whole plant, including both sides of the plant’s leaves.

Duplicate applications of this fungicide every seven to ten days before the fungus was completely eradicated.

See related

Which Material Will Seeds Grow Better in?

The best growing medium for germinating seeds provides the oxygen, encourage, nutrients and water required for seedlings to thrive after they’ve germinated. The individual materials in your potting mix as well as their levels strongly influence the growth of your seed. The best growing medium uses a blend of coarse materials, organic matter and soil additives in equal measures to present the right growing conditions. Understanding the benefits each material supplies allows you to build a growing medium that your seeds may thrive in.

Structure

Adding coarse materials to your growing medium increases the pore space between the particles in your soil. This enables water to penetrate the soil and drain off from it faster. Adding fine gravel, coarse sand or perlite to your soil mix helps prevent the soil from getting saturated with water and decreases the formation of harmful fungi in the soil that can cause the seeds to rot.

Organic Material

Incorporating organic material in your potting mix improves the structure of the soil and supplies nutrients that your seeds will utilize as soon as they germinate. Peat moss or completely composted material broken to a fine loamy dirt are great sources of natural material for potting mix. Incorporating soil in the yard may also provide a valuable source of natural stuff.

Soil Planning

The best growing stuff for seeds supplies the conditions your plants need to develop. Acid-loving plants may benefit from the addition of sulfur, which reduces the pH of their soil. You can also utilize soil additives, like vermiculite, to enhance the capability of your soil to store nutrients and water. Potting mixes that have untreated organic stuff can harbor microorganisms that could harm your plants. Sterilizing your growing medium with a heat treatment ensures that your growing medium isn’t harboring anything harmful to your seeds. Spread the expanding medium to a tray and heat it in your oven to 145 degrees Fahrenheit for 40 minutes to dominate most microorganisms.

Seed Germination

Several types of low fertility materials provide an effective way of germinating seeds. Seeds germinated in such materials need immediate fertilization or removal to a more conventional potting mixture after they’ve germinated. Finely textured vermiculite holds water efficiently and supplies a loose texture that allows small seeds to germinate readily. Mixtures of peat moss and vermiculite or perlite additionally provide an effective medium for germinating seeds. Applying a thin layer of these materials above a layer of fertile soil provides a seed bed that offers quick and efficient germination with a fertile growing medium for the origins of the plants that are emerging.

See related

How to Grow Bottle Brush

Evergreen bottle brush shrubs (Callistemon spp.) Fill gardens throughout U.S. Department of Agriculture plant hardiness zones 8 through 11 with stunning spring-to-summer color. Cylindrical, bushy-stamened flowers in a assortment of yellow, red or yellow appear brighter against needle-like, gray- to deep-green leaf. Hummingbirds flow to the nectar-rich blossoms. Bottle brush alternatives consist of tidy cultivars, such as 4-foot-high and wide “Compacta,” and 10- to 12-foot shrubs suitable for privacy screens, such as scarlet bottlebrush (C. citrinus). Grown in the perfect place, bottle brush thrives for decades using a minimum of maintenance.

Select a planting site in sunlight with well-drained, dry to moist soil. Bottle brush performs best in acidic to mildly alkaline soils with pH readings between 5.6 and 7.5. Foliage on plants in highly alkaline ground often develops chlorotic, or yellowing, from chlorophyll reduction.

Plant bottle brush at autumn when cooler temperatures decrease pressure in the rooting plant and winter rains help it build with a minimum of supplemental irrigation. Set it at an inward-angled hole measuring three to five times the width of its root ball at the very top and twice its breadth at the base. Make the hole deep enough that the top of the main ball protrudes 1/4 into 1/2 inch over its edge.

Water bottle brush whenever its leaf begins to wilt, or so the top 3 to 4 inches of soil are dry to the touch, during its first growing season. Once its origins are well established, water only during prolonged dry periods. Slow, deep watering using a drip system or soaker hose encourages deep, deep drought-resistant roots.

Feed the tree with a slow-release, 8-8-8 fertilizer in spring and summer. Apply the fertilizer according to the manufacturer’s recommendations.

Prune bottle brush straight after its new growth emerges, but prior to the tender tissue has hardened and set flower buds. Pruning to remove spent blossoms also keeps it tidy. After several years, cutting all of the branches to the floor and also providing the tree an extra dose of fertilizer results in vigorous development.

Scrub bottle brush for Dictyospermum scale infestation. The yellowish-brown, 1/16-inch barnacle-shaped pests colonize and consume sap from the tree’s foliage. While they seldom cause enough damage to warrant therapy, blasting the plants using a powerful jet of water removes the insects.

Watch the shrub for yellow leaves, a sign of iron deficiency. Treat the issue by applying iron chelate into the ground at a rate of 0.8 to 1.6 oz per 100 square feet. The program remains effective for up to three years.

See related

How to Grow Cucumbers in an Unheated Greenhouse

Cucumbers grow best in U.S. Department of Agriculture plant hardiness zones 4 through 11 as a warm-season vegetable. Growing cucumbers in an unheated greenhouse allows a gardener to extend the growing season until the end of November. Even with limited temperature control, greenhouse growing benefits the cucumber plant. With the correct care, cucumber bushes can produce up to 20 pounds of fruit per plant.

Mix together equal parts of potting soil, perlite, peat moss and compost to make loose, fertile ground. Don’t use regular garden soil from the ground, because this could introduce garden pests into the greenhouse. Fill big shallow containers using the soil mixture.

Prune back each young cucumber plant using a sharp knife so that only the strongest branch is left. Remove the plants in their nursery containers and then transplant them in the center of each ready container. Each cucumber plant requires 6 square foot of space.

Punch holes at the backs of the containers and thread a heavy duty string through each hole. Run the string up to the horizontal supports overhead at the greenhouse. As the cucumber plants grow, train them up the string trellis.

Water the ground around the base of each plant until the water drains out the bottom. Don’t water the cucumber crops again until the top inch of soil is dry. Don’t let the containers dry all of the way out, because it will kill the roots of the cucumber plants. Watering during the morning or early afternoon is greatest; it allows the plants to dry off before the greenhouse cools at night.

Cool off the greenhouse during the hottest days, using enthusiasts. The perfect temperature for growing cucumbers is between 75 and 80 degrees Fahrenheit during the day and no lower than 65 degrees Fahrenheit during the evening. Don’t let the greenhouse temperature hit over 95 degrees Fahrenheit — this will stop fruit development.

Feed the cucumber crops using a fertilizer formula constructed for vegetables one week after the plants start blooming. Use water-soluble fertilizer or slow-release fertilizer every three weeks after the first dose. Follow the instructions on the package to prevent overfeeding the cucumber crops, which stunts the development of the fruit.

Pollinate the cucumber crops by massaging each blossom that has a small soft paintbrush. Normal pollination is carried on by bees from the garden. Check the cucumber number to see if they want pollination. Certain types do not require pollination to produce fruit.

Pick the fruit when it’s 6 inches in length or smaller. Should you allow the fruit to grow on the vine for too long, then the cucumbers turn yellowish; skin gets tough; big seeds develop inside; and fruit production lessens.

See related

Homemade Plastic Mulch Layers

Placing plastic mulch over planting beds is an uncomplicated job, but doing it on a large scale consumes time and labor. Automated mulch layers make the process more efficient, but commercial layers are expensive, placing them out of the reach of many small growers. Some resourceful growers with architectural skills, however, have managed to design inexpensive, effective answers to the mulch-laying issue.

Plastic Mulch

Plastic mulches have been in use by commercial growers since the 1960s. They consist of a thin layer of plastic that is laid over the crop planting bed before putting and pressed snugly against the dirt. The mulch covering helps raise soil temperature and keep moisture, which results in fewer pest and weed problems, earlier crop maturity, higher yields and improved crop quality. Plastic mulches have proven particularly helpful in the production of crops such as melons, squash, cucumbers, strawberries and cut flowers.

Laying Mulch

Growers lay plastic mulch, which is derived from the maker in rolls, from unrolling the plastic above the planting rows. Plastic mulch works best on raised beds that help in raising the soil temperature, so bed planning is a vital step in the mulching procedure. The mulch also performs best when it is in touch with the dirt, so the grower should take care to ensure that the mulch stays flat, with no air spaces between the soil and the mulch.

Commercial Layers

Since putting plastic mulch by hand is a time-consuming and labor-intensive procedure, farm equipment manufacturers have developed automatic mulch-laying machines to make the job easier and faster. Automated mulch layers are tow-behind attachments that are pulled by a tractor. Commercial layers have parts that produce the raised beds, unroll the mulch and keep it in place, pressing it firmly to the soil. Some layers can also be fitted with attachments to give irrigation, fumigation and fertilization.

Homemade Solutions

Industrial mulch layers are costly, and small-scale growers may not require all of the add-on options that commercial layers offer. However, even small-scale growers can benefit from an automatic mulch-laying alternative, and a few growers have designed and constructed homemade layers. These layers may be as straightforward as a roller that mounts under a tractor and unspools the flux, leaving it to the tractor wheels to keep the mulch in place and press it in the dirt. Other solutions are more complicated, with shovels that form the beds and discs that place the mulch. A basic mulch layer isn’t a intricate machine, but assembling one needs mechanical aptitude and metalworking skills.

See related

How can I Mount a Train on Walls?

Mounting a model train track on the wall saves loads of table or floor area and lets you leave the train set up all the time since it is out of the way. Construct your own wall-mounted setup using shelving and shelf brackets, or buy a specialty wall-mount system that appears as if it were custom-made to your space.

DIY Shelving Option

Run the track around the whole perimeter of this room by first quantifying each wall to find out how much shelf space you require. Long, pre-made fiberboard shelves offer an inexpensive option for the right runs of track; a corner shelf or a triangle of wood cut to fit each corner cares for the curved areas. Install shelf mounts directly into studs every 3 to 4 feet in the desired shelf height, keeping in mind the boards and the monitor take up some space. Assess the height of the tallest train car or accessory such as a tunnel; install the shelving in a height that accommodates the whole design with room to spare. Insert the shelving along the whole perimeter of this room, within a few inches for every single corner. Put in a length of track near each corner; then add the curved pieces in the corners to figure out how big of a shelf or even piece of wood you’ll need to your corners. Buy or cut wood to size for each corner; encourage the corner pieces with extra corner mounts.

Homemade Enclosure

Like trains mounted on a tabletop track, wall-mounted train automobiles can derail from time to time. Prevent the risk of dropping train cars by including a Plexiglas enclosure several inches high around your trail’s support shelving shelving unit. Drill a few holes to secure the material to the shelving using screws, or utilize a construction adhesive or hot glue to hold it in place.

Floating Track Mount

Some companies offer a sleek wall-mounted system that appears to float in the room, such as a floating shelf. A special interlocking channel system holds a few of these kinds of train mounts into the wall. Order the mounting program based on the magnitude of the monitor layout as well as the scale of this train collection. Some models allow space to conduct over one train at a time on independent tracks.

Add-on Elements

Decorate your wall-mounted track system with the addition of tiny LED up-lights or rope lighting behind the monitor between the monitor and the wall. For a home made shelf-style strategy, add decorative trim from the lumber section of a home improvement store to make the design look less easy. Paint the shelving to meet other trim at the room. Add tiny, compact trees for a little nature. Cut and paint thin wood or cardboard constructions to mount directly to the wall behind the train as miniature towns and train stations.

See related

Living Room Paint Trends

Prominent paint producers track the paint color purchases by consumers and identify annual emerging shade trends from that information. Living room wall colors that lean toward a relaxed, laid-back feel are always on trend. From soft and soothing wall tones to bold and lively accents, stylish paint colors set the air for your whole living room. Create a new look for your space by picking a fresh palette to fit your color passion.

The New Neutrals

Watery greens, blues, lilacs and pinks are in trend for living room walls and are fashionably known as “the new neutrals.” The filtered tones offer you a peaceful shift toward a calm, relaxing ambiance. Light blue walls surround you with an airy, crisp feel, while creamy ivory or barely yellowish walls reverberate a country cottage mood. Wispy lilacs and pinks bring about a joyful atmosphere. Select mint green to inject a natural outdoor vibe into your living room space.

Colors of White

White is traditionally a elegant paint color for any living room area. While stark hospital-white isn’t a typical favorite, almost any shade of white with a hint of shade makes the hip paint list for modern living rooms. Expand your walls in clean white for an airy, crisp feel with a modern Scandinavian twist. Or warm up a large space by covering your walls using a yellow-tinted white paint. Pick several shades of white to highlight a living room with strong architectural details, like crown molding, exposed beams, wainscoting and a fireplace mantel. The white layers help distinguish the textures in every architectural feature.

Warm Grays and Earthy Browns

Well-established gray serves as the new black — especially warm gray tones, which replace cool gray tints for living room walls. Gray colors using a hint of yellowish provide a romantic coziness that is lacking in cool bluish grays. If you want a color cousin to gray, select a comfy taupe tint, which symbolizes the soft side of brown and is all of the rage. Earthy brown hues are best contenders for living room walls because they are inclined to inspire the serenity and serenity that is found in nature.

Stylish Trim Tones

Pristine white and off-white continue their reign as the most favored trim colors for any living room wall. Coal black baseboards communicate a modern design statement, just as bold-hued feature walls add prominent focal points. Pick out a monochromatic paint tone for the accent wall to keep your living room walls at the exact same color family. For example, when you’ve got watery blue walls, then choose a dark navy or royal blue tone to your accent wall. Bright, vivid colors that are in vogue for your feature wall comprise sunny yellow, rich red and cool teal.

See related

Do You Paint Doors to Match the Wall?

The interior and exterior colors of the home are mostly a matter of personal preference; if that weren’t true, painting wouldn’t be much fun. Nevertheless, color-matching guidelines can help you maintain congruity and a sense of harmony, which, in accordance with feng shui, helps you maintain a positive and healthy outlook. Painting doors to match the walls doesn’t violate these guidelines, but it doesn’t always further them. Design door and scheme placement are also important considerations.

Highlights and Contrast

Interior designers traditionally consider the doorway as a portion of the interior trim, which comprises the baseboards and door and window casings. It is uncommon to paint trim the exact same color as the walls, although the monochromatic effect this creates may complement oversized windows or a fireplace that is dominant. Designers more commonly use trim to highlight the wall colors by painting them a different color, and they often choose a color for the door that either matches the complements or trim it. In a bold color scheme, the doorway may also offer comparison. A red door in a room with light green walls and forest green trim is a good illustration of such a bold contrast.

Feng Shui and Direction

In feng shui, the doorway specifies the northern direction at a room, and the colours for north are black and blue. The true geographic direction that the door faces can also be important. Depending on the nature of the room, it might be more advantageous to highlight one over another. As an example, red highlights the natural fire element of a south-facing door, but if the room has a fireplace in the wall opposite the doorway, a blue door specifies the fireplace wall as south, which can be an appropriate placement for a fireplace. On the flip side, in a room with several defining characteristics, painting the south-facing doorway crimson reinforces real geographic orientation and is probably more suitable.

Matching Colors

If you’ve got a room full of interesting furniture or expressive paintings, you might not need much definition in the door and wall colours. If so, you might choose to paint the doors the identical color as the walls. The paint you use for doorways typically has a different sheen than wall paint, which difference could be more than enough to distinguish the doorway and make it stand out. If the door opens to the room, then you usually paint the edge the identical color as that side of the doorway. Do not forget to pay attention to the option of color on the other side of the doorway, as it is visible when the door is open.

Exterior Door Colors

Whereas it isn’t unusual to paint an interior door the identical color as the walls, the exact same isn’t true for exterior doors. In feng shui terms, an exterior door — especially the major entrance door — is a gateway for chi, or energy, to enter your home. It should harmonize not just with the color of the walls, but also the surroundings and the direction the doorway faces so as to draw the sort of energy you want. For example, green is the natural color for east and highlights the wood element. If the home is already predominantly green, however, or tons of trees are around the home, you may pick another color, such as blue, white or red, to bring in the element that color signifies.

See related