6 Common Home Inspection Missteps That Cost Buyers a Lot of Money

When you decide to buy a home, it’s very important to make sure that it’s solid and good enough for you to live in. However, you don’t need to be a structural engineer to assess the quality of the house you are about to buy. The modern practice these days involves hiring handyman services Aurora CO to check everything and report back to you on the status of the home. But hiring a home inspector is not enough. There are some things that you must avoid in order to ensure that the value of the inspection report is good.

Not Getting Multiple Recommendations

It’s very likely that your real estate agent will recommend a home inspector for you. Although most of the time the recommended inspector might be good, do not take any chances. Make sure you vet the inspector before you decide to hire him. You can also get the second opinion of a different inspector just to be sure you are not missing anything.

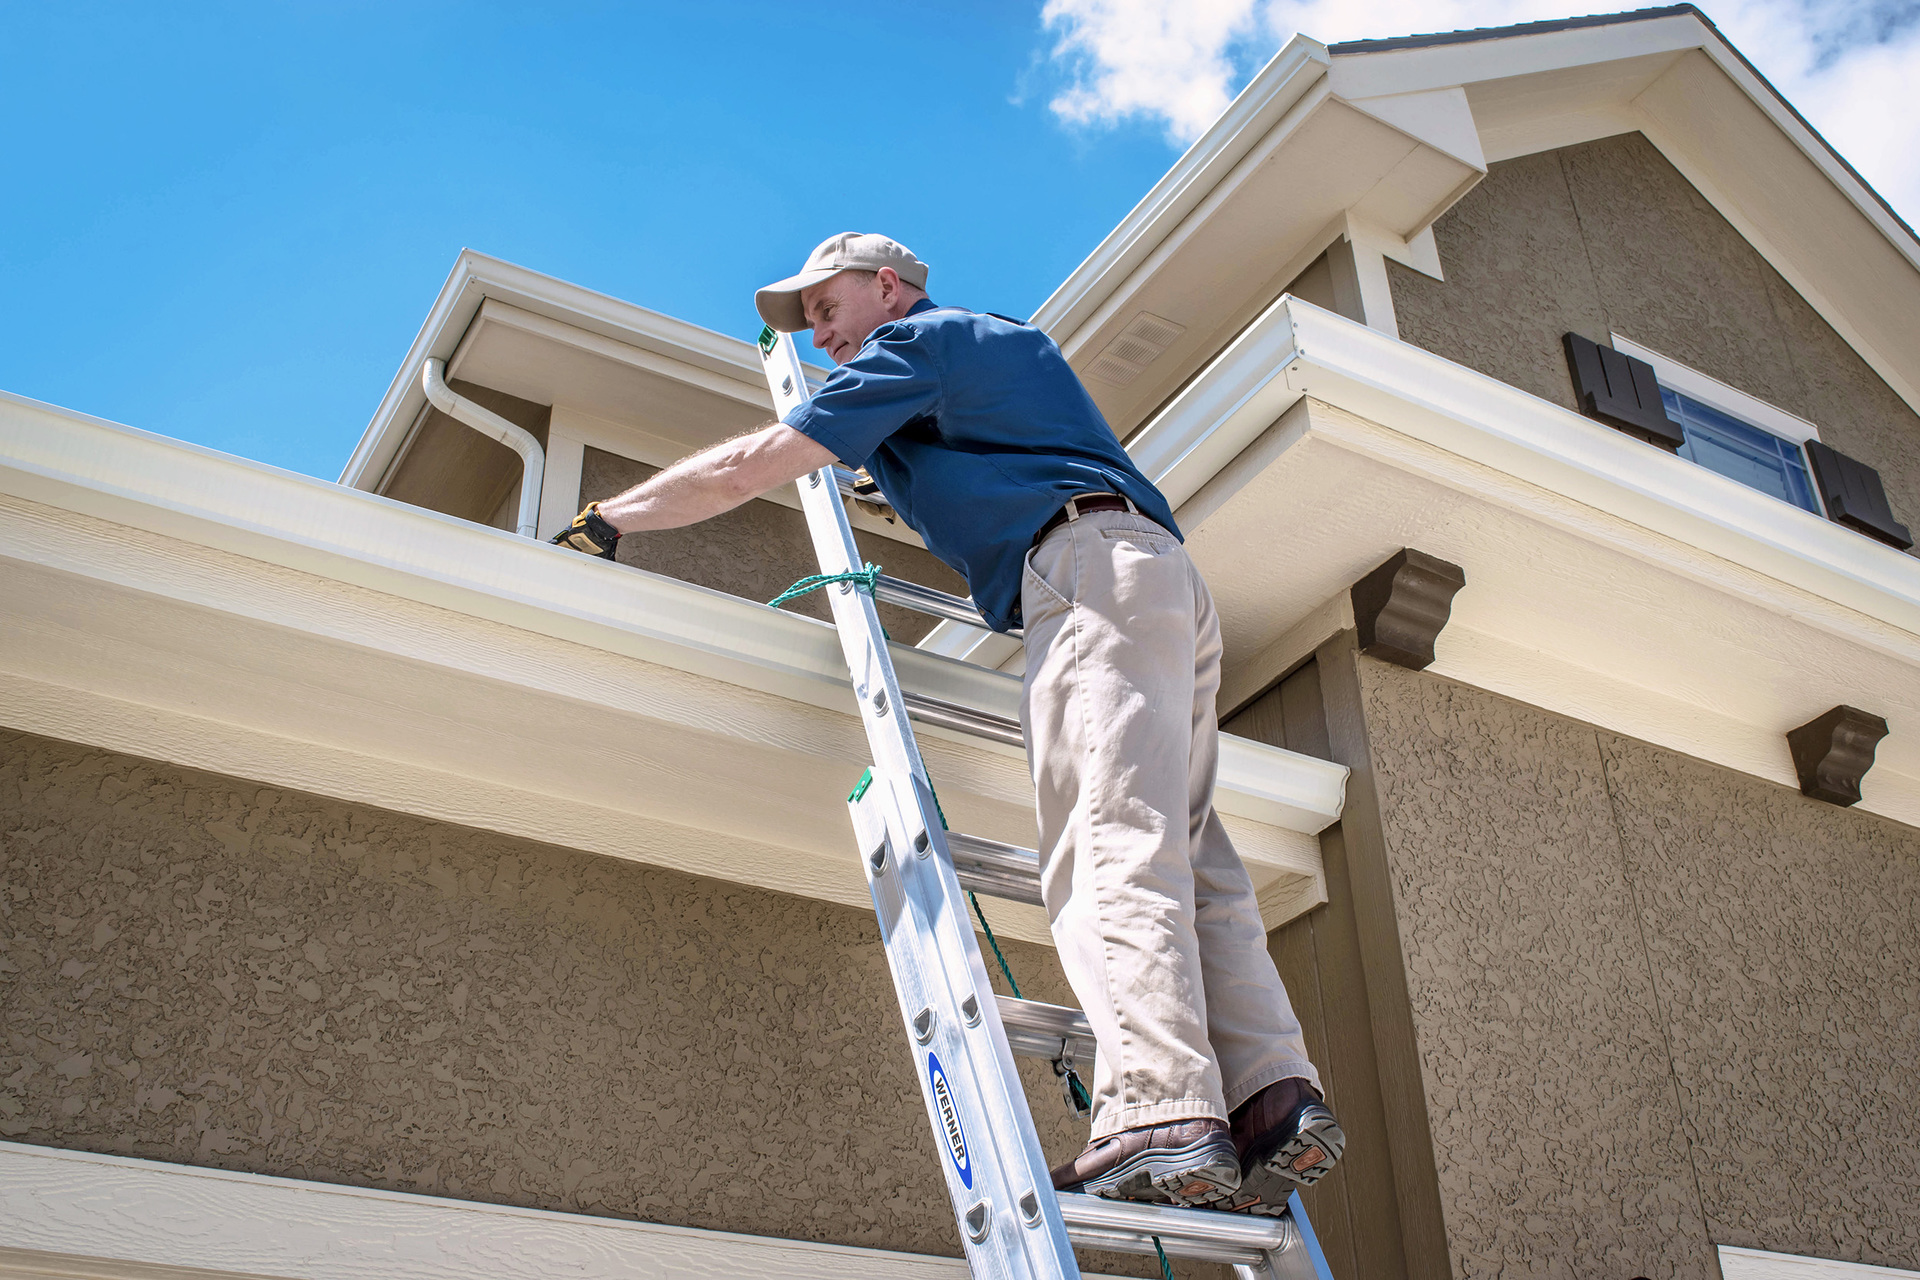
Failing to Attend the Inspection

Usually, many people hire a handyman Aurora service and disappear. This is not a good way of dealing with this issue. If you are going to get value from the inspection service, avail yourself during the day of inspection and ensure that the professional doing the job is thorough. Sometimes inspectors may decide to cut corners in order to save time. But if you are present, it’s highly unlikely that they will do this.

Not Asking Questions

There’s a popular saying that says if you ask a stupid question, you will be a fool once but if you don’t, you will remain a fool forever. There’s no stupid question when it comes to inspections. If there’s something you feel needs to be addressed, make sure you raise the issue with the handyman Aurora IL service provider. Always ask as many questions as possible.

Not Testing For Mold and Water Issues

The water flow in your home is very important. Before you buy any house, make sure the plumbing is in place and water supply is effective. The inspection should also check for mold in every inch of the home. There are very unique techniques that can be used in water testing and mold checking. A good inspector will know these techniques.

Assuming That New Homes Don’t Need Inspection

There’s also this assumption that just because a home is newly built, it does not need a professional inspection. However, even newly constructed homes can have problems and a proper inspection will identify these issues before you move in.

Failing to Seriously Consider the Inspection Report

The inspection report is very important and it should determine the next steps you need to take in order to make your potential home livable. Do not ignore any of these recommendations offered by the handyman Aurora CO.

Home inspection is an essential part of buying a home. Whether you are buying a new property or an old one, inspection will be needed to assess the quality of the structure.

The Treatment of Flowering Almond Bushes

Natives of China, flowering almonds (Prunus glandulosa and Prunus triloba) wear an amazing display in the backyard. The smaller of the two kinds of flowering almond. Dwarf flowering almond, or glandulosa, grows 3 to 4 feet broad and tall and creates pink or white flowers in -spring. P. Triloba grows 10 to 15 feet broad and tall, and generates masses of flowers early. Varieties like P. triloba “Multiplex” and P. glandulosa “Rosea Plena” function double flowers. Both kinds of almond develop through 14 and 9 . Both crops have treatment needs and the cultivation.

Soil and Website

Select. Flowering almond prefers. Enrich the soil as required by incorporating organic matter such as well- . Keep turf-grass four to six feet away from your plant. Test the pH level of the soil yearly. Flowering almonds choose a pH level that is slightly acidic to neutral. Coastal gardeners might have have a problem developing flowering almonds due to the intolerance of air of the plant.

Water and Mulch

Flowering almond prefers to keep its roots moist but not damp while it’s some drought tolerance. In extremely dry climate, in the event the soil throughout the plant is dry to some depth of many inches, water the plant seriously and gradually rather than often. Spread natural mulch but not touching — the root of the plant keep the roots cool in summer and to help preserve moisture. As it decomposes organic mulch also provides nutrients to the soil.

Fertilizer

Fertilize in the period, utilizing a product high in phosphorus. Drench soil and the leaves if using water soluble fertilizer, and follow label instructions for application and mixing frequency. Fertilizer that is spread outward to the fringe of of the branches in the stem. Use a tiny bit of of fertilizer in accordance with the package instructions. Water the plant thoroughly to to clean the fertilizer to the soil.

Problems

Flowering crops that are almond might fall prey to various diseases and insect pests. Aphids, scale insects and borers cause injury and development to the foliage and stems. Spider mites and tent-creating caterpillars can cause issues. Use insecticidal soaps or horticultural oil to smother these pests, or use an insecticide. Choose goods labeled for use in managing the particular pest attacking the plant. Powdery mildew causes leaves to seem as though they have been dusted with baby-powder. Knot causes galls, on flowering branches or distended places. Prune afflicted places a way and treat having a fungicide. Keep the area throughout the flowering of weeds and plant particles. Sufficient ventilation proper fertilization and sunlight, and normal watering to keep the flowering bush wholesome are the finest defenses against pests and disease.

Pruning

Flowering almonds could be pruned as so on as the plant finishes flowering. Flowers kind on the progress of the prior year’s, so minimize branches straight back to within several buds of the wood that is aged. Prune branches to shape the bush that is almond in to tree kind. Cut a-way lifeless or dis-eased wood asneeded.

See related

The best way to Grow Rhododendrons in Containers

You can find almost 1000 species of rhododendrons (Rhododendron spp.) and they increase in most places of the region, including Sunset’s Climate Zones 14 through 24. Rhododendrons are very easy develop in many climates and to care for. Rhododendrons can prosper in a container, provided which you supply all of them using the correct light, water and schedule if you have limited room. The blossoms enhance the curb appeal of your house and add looks to your porch or patio.

Clean an appropriately-sized rhododendron for the container. Opt for types and dwarf types which don’t grow over 4 4 or 5 feet tall. The selection Rhododendron daphnoides produces flowers which are blue and lavender in colour and reaches a peak of approximately 3-feet. The Bright Red Question cultivar grows to about 2-feet tall and produces scarlet blossoms.

Fill. Leave 3 or 4″ of room between the very top of the planting medium as well as the lip of the container.

Dig a hole in the planting medium that’s 2 to 3 times as broad and deep as the root ball. Put the plant to the hole and cover the roots with planting medium that is extra.

A layer of natural compost across the bottom of the rhododendron to assist the plant retain moisture. Keep the mulch from getting into contact. Reapply required through the entire growing season.

Place the container in partial shade or full sun to inspire flower and development production. Move the container, as required, when sunlight and the seasons change shifts.

The rhododendron when the soil gets dry. Poke your finger to the soil throughout the rhododendron. Water the plant using a hose or watering can, when it’s dry to the touch. Use enough water to carefully moisten the s Oil, which assures that sufficient dampness is got by the roots.

Apply a a skinny layer of fertilizer. Do this to motivate blossoming that is vigorous. So that you apply the proper amount follow the guidelines on the fertilizer.

Pinch off wilted and lifeless blossoms. Removing these retains the plant searching desirable and encourages mo-Re production of flowers.

See related

6 Small Bathroom Design Ideas

For the past 30 years, the size of bathrooms has become larger and larger. If you own an old home, then it’s highly possible that your bathroom is smaller compared to the ones in new houses. house repairs may be one of the solutions and the right tricks can help create the perception of a roomy bathroom. In this article, we are going to list a few of these tricks.

Asian-Inspired

Asian houses usually have small bathrooms but they do know how to make them look big. A good design is adopting a contemporary Asian theme from the 1980s. This means that you’d want a Japanese Kaidan Tansu, which translates to “stepped chest.” It’s a good way of adding fluidity to a small space. The use of dark colors is also good at making the corners blend with the wall which expands the perceived space.

Beach Day

One of the best ways of expanding the perceived space is by associating the bathroom to something that has a lot of open space, namely the beach. You can start by getting rid of a needless closet. Then, add ambient lighting which is great at creating an illusion of space. You can use shallow cabinets for storage purposes. To highlight a stylish design, add a “dry riverbed” made of stones right into the floor.

His and Hers

This is a good handyman services project if you want something that has elements of masculinity and femininity at the same time. The main design elements are the continuing horizontal lines, a large frameless mirror, and strategically placed lighting. All these elements are aimed at creating the illusion of a larger space. You’d also want a shower with a curbless entry to maximize the foot space.

Simple and Elegant

If the budget is a bit tight, then you can go for something that’s simple and elegant. You can use a “curved front” vanity to maximize the space available as you can incorporate 2 drawers on rolling sliders. To give a side of elegance, use cherry wood on the drawers.

Zen Escape

A Zen theme is perfect for small handyman. After all, enjoying more with as little as possible is one of the cores of the Zen philosophy. Also, having a Zen escape is easy to do. The first thing you’d want to do is to remove all the unnecessary stuff in your bathroom. Give your bathroom a bit of Japanese taste by decorating it with a Shoji screen that spans from the floor to the ceiling. A huge mirror is also a great addition. A towel rack is good for adding storage without taking up too much space.

Small Spa Retreat

This bathroom idea is great if expanding the size of the room is not really an option. For starters, you’d want several mirrored surfaces to cover the bathroom. Then, you’d also want to add white marble tiles. A glass shower wall is great at eliminating visual barriers which make the bathroom feel more cramped. For the final touches, you’d want rich wood tones as they would create balance and add warmth.

The best way to Get Cleared of Sunflowers

Sunflowers (Helianthus spp.) aren’t for every gardener. Their bigger-than-life stature may be a distraction in the backyard as well as the types that are perennial can distribute and become a nuisance. To get cleared of your sunflowers for great, you will need to eliminate their roots, as well as the crops and seeds. By utilizing different techniques, chemical weedkillers can be avoided by you and develop preferred crops within their place.

Place a tarp on the floor in the event the sunflowers have seed heads or blooms. Cut the blooms off and spot them. Do this on the very top of the tarp so you discard and can sweep any dropped seeds. Rake the region across the sunflower and tarp crops for seeds that are wayward.

Cut the sun-flower foliage and stalk to the floor. For types with stems that are thick, you might need to use shears. A pair of pruning shears or garden clippers ought to be enough.

Dig the roots using a spade out. Expect sunflowers that are proven to have a more expansive root system than annuals. Sunflower roots tend to increase from the sunlight, toward the west. Adjust width and the digging depth as required to eliminate as a lot of the root system.

Pull or dig sunflower shoots up that re-emerge in the floor. The plant will ultimately die, in the event that you keep doing this.

See related

The best way to Identify a Potbelly Stove

Stoves can include a feeling of traditional charm to your own living space. Popular in the late-1800s , these stoves on average were utilized for warmth . for cooking and They usually had ornate styles and were shorter and smaller than several wood-burning stoves. They resemble other kinds of stoves that are antique, including the cylinder stove, but the barrel-shaped burn pot helps you differentiate a potbelly stove that is true.

Potbelly

The primary defining attribute of a pot-belly stove is the middle area. Unlike cylinder stoves, which are spherical but go up straight, the pot-belly stove features a bulbous middle that rounds out from top part and a more narrow bottom. There is also a rim round the midst of the heart, barrel- area. This rim is known as a skirt rail. Some skirt rails seem like trim that is little, while the others therefore are so extensive cooking utensils may be set to them and have designs.

Material

The stoves are manufactured from cast iron even though some contemporary variations of a pot-belly stove are manufactured from steel. There are generally two-doors on the entrance made of cast-iron. The very best door is for loading coal or wood, big, as well as the door is utilized to eliminate ashes and smaller. In order to watch the fireplace burning in contemporary stoves, the best door is an average of glass.

Flat Best

Because pot-belly stoves were used for heating along with cooking, the very top of the stove needs to be flat to produce a warm cooking surface. Some pot-belly stoves have domes on best which can be lifted to expose cooktops that are flat. The kitchen that is flat is generally broad, flaring out nearly as big as the middle of the burn up pot that is pot-belly.

Exhaust Pipe

True pot-belly stoves have prolong upward in the cook plate and exhaust pipes, which which are generally huge and black. Some exhaust pipes are put on along side it of the pot. They has to be ventilated to ensure security, although some pot-belly stoves might be changed into burn up fuel as an alternative to wood.

See related

The best way to Compost Begonias

Brighten your house with hanging baskets and window boxes full of vivid-coloured begonias. Herbs, indigenous to the tropics are grown throughout the planet. Gardeners in the Climate Zones 14 to 24 of Sunset can abandon begonias outside year round. In cooler climates, crops needs to be brought indoors before the temperature drops. You’ll find more than a lot of species in the begonia and much more than 10,000 begonias that are cultivated. The main types contain rhizomatuous, fibrous- and tuberous- begonias. Begonias develop best in a well-drained combination of natural compost (well-aged leaves, grass clippings, kitchen vegetable scraps or worm castings) and sand. Begonias thrive in moist, partly shaded areas. They can’t do best at average temperatures of 55 to 65 degrees Fahrenheit and tolerate heat.

Plant begonias in a mixture of 1 part natural backyard compost, 1 part peat moss and 1 component backyard sand. (Don’t use beach sand, which may contain salt.) Begonias prosper in a mixture which is nutrient-rich and free- . (Several savvy begonia gardeners choose well-aged oak leaf compost combined with with the equal portion of sand.) Tiny begonia seeds may be germinated in this combination. Fill potting pots or trays using the mixture. Water well and allow to drain. Mix the seeds with 2 to 3 tablespoons of sand to facilitate distribution. Sprinkle the seed/sand mixture on the the top of mixture. Tamp down and mist with water. Place in an area with great light but out of sunlight. Keep the soil moist but not soggy. When crops are 4 to 5″ tall, transplant to to 6 to eight pots, utilizing the same mix of potting mixture.

Plant begonia corms or tubers in the compost combination. Plant in hanging baskets, containers or flowerbeds. (Plant tubers or corms using the hollow (concave) side-up.) Place an extra 1- to 2 inch layer of compost on the soil area of begonias planted outside to to manage weeds and retain moisture.

Protect begonias from winter. When the temperature falls below 55 degrees Fahrenheit, move begonias indoors. Begonias can stay in in pots and cultivated as house plants that are beautiful. Dig the tubers or corms brush off the combination and retailer in a cardboard-box, included in newspaper. Place in an awesome, darkish place until re-planting that is prepared for spring.

See related

The best way to Install Trim Moulding on Curved Corners

Because the mid-1970’s, drywall finishers have been making curved, or radius outside corners. Radius corners soften the appearance of a space compared to the conventional result created by 90-degree angles on exterior corners and around windows. Installing moldings isn’t hard, but you’ll need to take out your math abilities a little. Fortunately, all the cut angles will be the same, 22.5 levels. No match will be best because of imperfections in the wall close to the corner radius, or due to imperfections in the texture on the wall. Patience is required for because of this trialanderror approach.

Preparation

Measure and mark the backside of a bit every two inches, of trim. Make one mark for every corner piece you want to create.

Cut the parts using a chop saw. Set the blade angle at 22.5-levels or 67.5-levels depending on the kind of scale your observed uses. Keep the trim piece you’re cutting square to the saw’s rail and square to the saw’s foundation when you reduce.

Piece is cut by the back side of each around one-inch from the first-cut. Measure some parts somewhat smaller than one-inch and some parts somewhat bigger. Don’t exceed 1/8 inch bigger or smaller.

Rotate each piece that is little, before cutting -degrees in the direction utilized throughout the first-cut. Cut each trim piece that was little together with the chop saw over the line. The first-cut will be mirrored by this cut.

Installation

Install the horizontal trim on every side of the corner. Cut these parts with a 22.5-diploma angle. The front side will not be lengthier than the backside of the trim. So the backside edges of the items stop in the idea where the radius starts on each aspect of the corner install the items.

Apply heavyduty development glue to the trunk of the double- cut corner piece that press it in to location, and you want to install. The glue ought to be thick enough to contain the the corner piece that is trim set up.

Wipe a-way any excessive glue from your seams involving the corner piece and also the horizontal items, and any excess glue on the very best of the corner piece.

Subsequent to the glue h-AS dried caulk any gaps involving the corner as well as the corner piece.

See related

The best way to #3 9 Prune Traveler&;s Palm Trees

The fanlike Traveler’s Pal-M, Ravenala madagascariensis, isn’t a palm-tree in any way. This plant belongs to the family and is a near relative of the banana plant. Its title comes in the leaf base development, a shape that retains water that tourists could consume. Traveler’s Palm does best-in tropical climates, but tends to quickly outgrow its area, therefore normal pruning is required to keep it under control. Furthermore, Traveler’s Palms that have sustained frost or freeze injury needs to be pruned to market recovery.

Pruning shears spade or observed. In case your cutting tools are boring, they’re going to chew and shred your Traveler’s Pal-M as opposed to cutting it cleanly.

Prune spent flower-stalks in the bottom close to the lover construction. Do not cut in to the fan.

Remove tattered brown or broken outer leaves close to the central lover construction with loppers or pruning shears, but usually leave the lover framework set up.

Trim off the outer two or three leaves on each and every side of the lover to form the Traveler’s Pal-M and keep it from spreading outside the location where you want it. Never cut to the lover construction that is central.

Slice to the ground using a sharp spade involving the Traveler’s Pal-M and any smaller shoots, called suckers, that seem in the floor close to the trunk of the primary plant. The spade manage from the sucker toward the floor. Remove all suckers as quickly as they seem to maintain a clump.

Repeat the trimming and pruning process frequently to keep your Traveler’s Palm wholesome and contained inside a tiny region. It’s much tougher to minimize again than to prune, in case you allow it become over-grown.

Wait till all risk of of freezing or frost is previous before pruning ruined or lifeless foliage from a a chilly snap. Prune lifeless leaves of the enthusiast with sharp pruning shears or loppers when some new growth h AS appeared. Cut off any parts of of leaf that is lifeless stems, but abandon the enthusiast framework that is central in position. Leave any ruined leaves in location. It is better to reduce inadequate than also significantly. When leaves have been developed by the plant, trim off the broken kinds.

See related

The best way to Grow Sunlight Sprinkle Roses

Patented by John Walden in 1999, Sun Sprinkles (Rosa “JAChal”) are miniature roses ideal for smaller gardens, patios and decks. Their tea-shaped blossoms and fragrance will delight the senses to late summer. Like the majority of roses, Sun Sprinkles are extremely flexible, flourishing in almost all all of the Environment Zones of Sunset. Their dark green foliage resists rust illness and mildew, creating these miniature delights very simple to care for.

Prepare the rose bed weeks before planting. Pick an area with at least six hours of sunlight.

Dig holes somewhat deeper in relation to the root ball and in the soil arrived in. Allow 12 to 24-inches of room between the holes. Spacing will have better aesthetic charm.

The rose in the pot. Spread out the roots to the soil and pack the soil round the root ball. Refill the hole so that that the rose is just above floor level.

Water the roses in the morning to provide them with adequate time to dry and avoid fungal and illness infections. Give at least 1-inch of water per week to the roses, and ensure the soil around them stays moist.

Mix compost or organic fertilizer like manure and peat moss to the soil to ensure appropriate nourishment is received by the Sun Sprinkles, but be conservative. Water is the greatest treatment for roses that are ailing.

Manicure the roses occasionally throughout the growing period to promote development. Branches and clip lifeless flowers with clippers or pruning shears. Cut back canes that are remaining by approximately one third.

Check for pests like spider mites and aphids, worms, slugs. Spider mites using use, and a hose correctly labeled pesticides for other pests.

See related